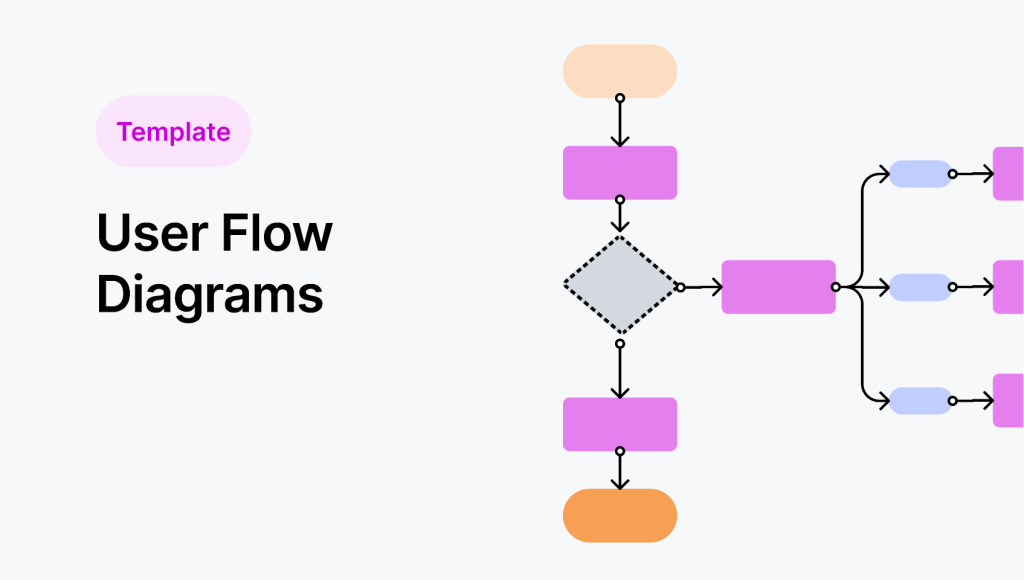
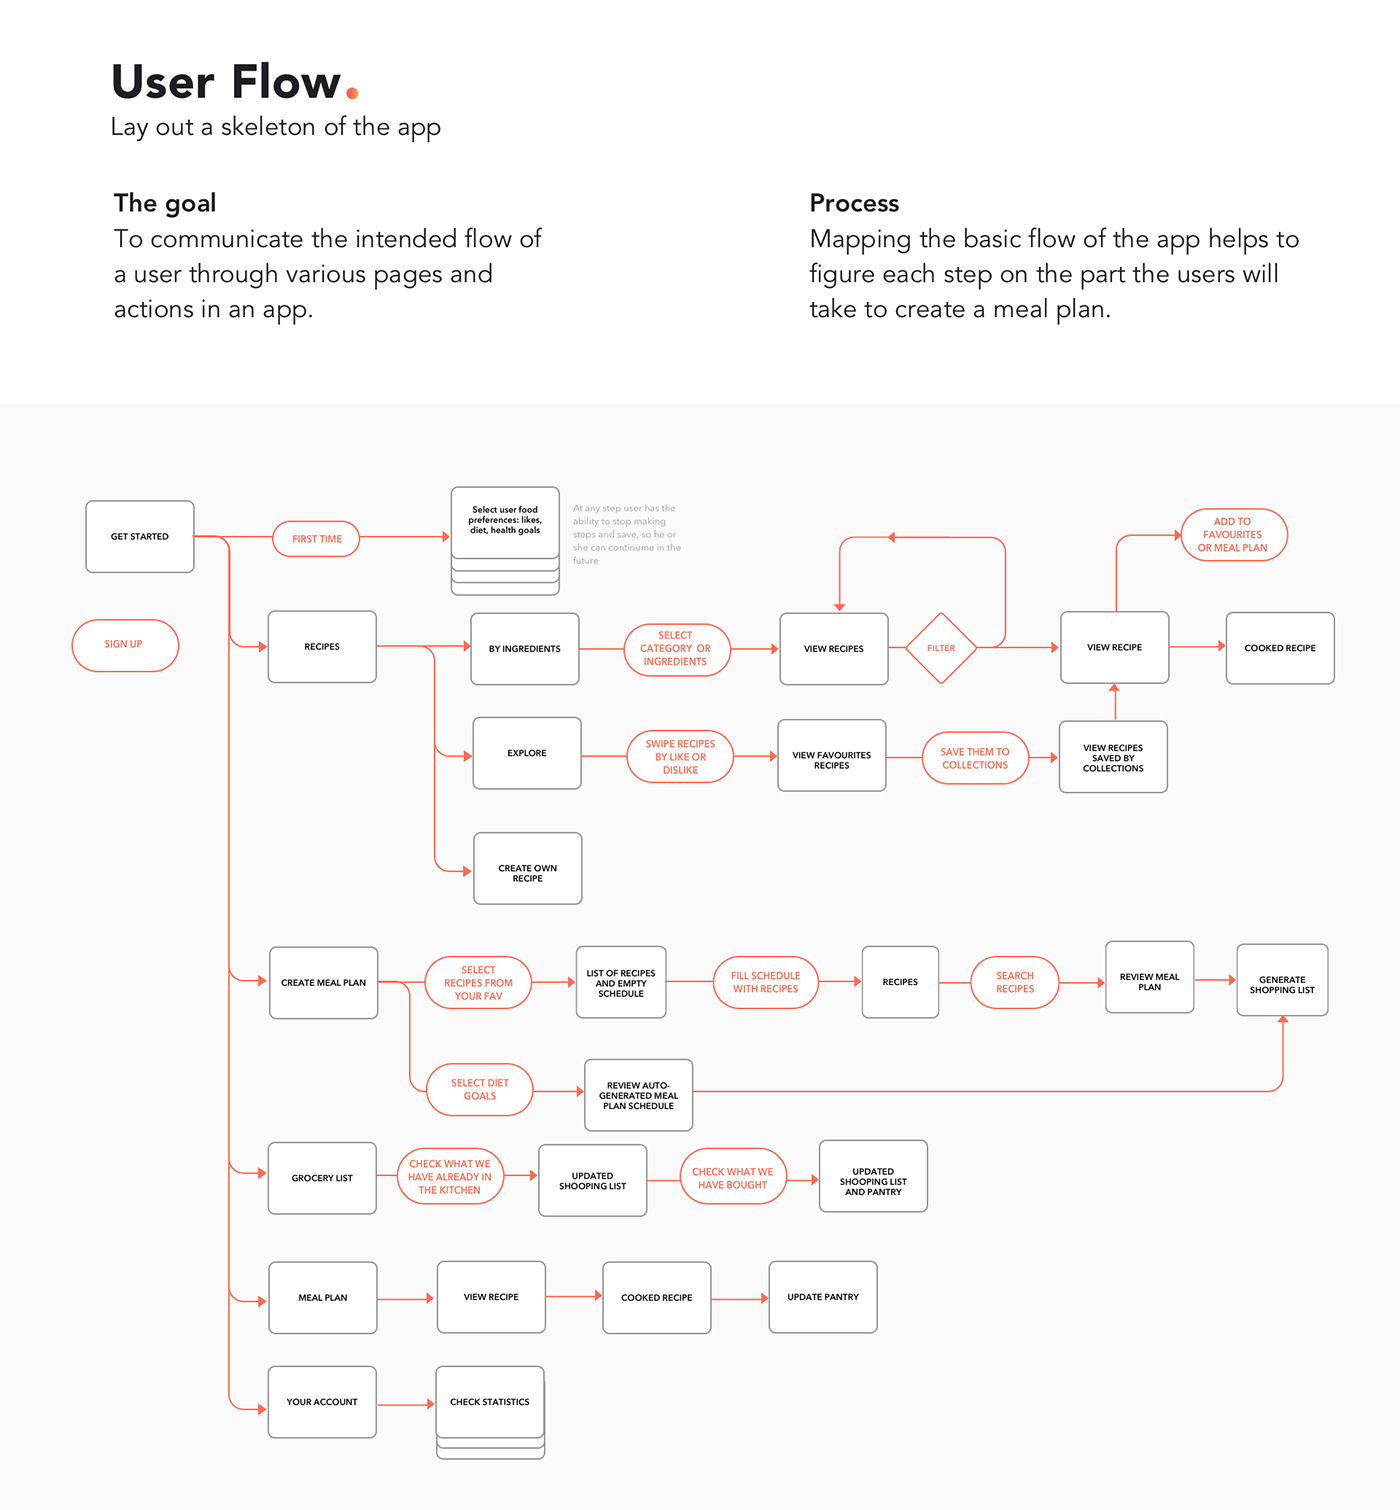
User flows, UX flows, or flowcharts, sometimes called diagrams that display the complete path a user takes when using a product.
The user flow maps out the user’s movement through the product, mapping out each step from the entry point to the final interaction.
Browne, C., (2024). What Are User Flows In UX Design? Retrieved from:
Source:
Style, C. (n.d.). My MealPlan – App UX Case Study. Retrieved from https://www.behance.net/gallery/86974285/My-MealPlan-App-UX-Case-Study
Pencil and Paper
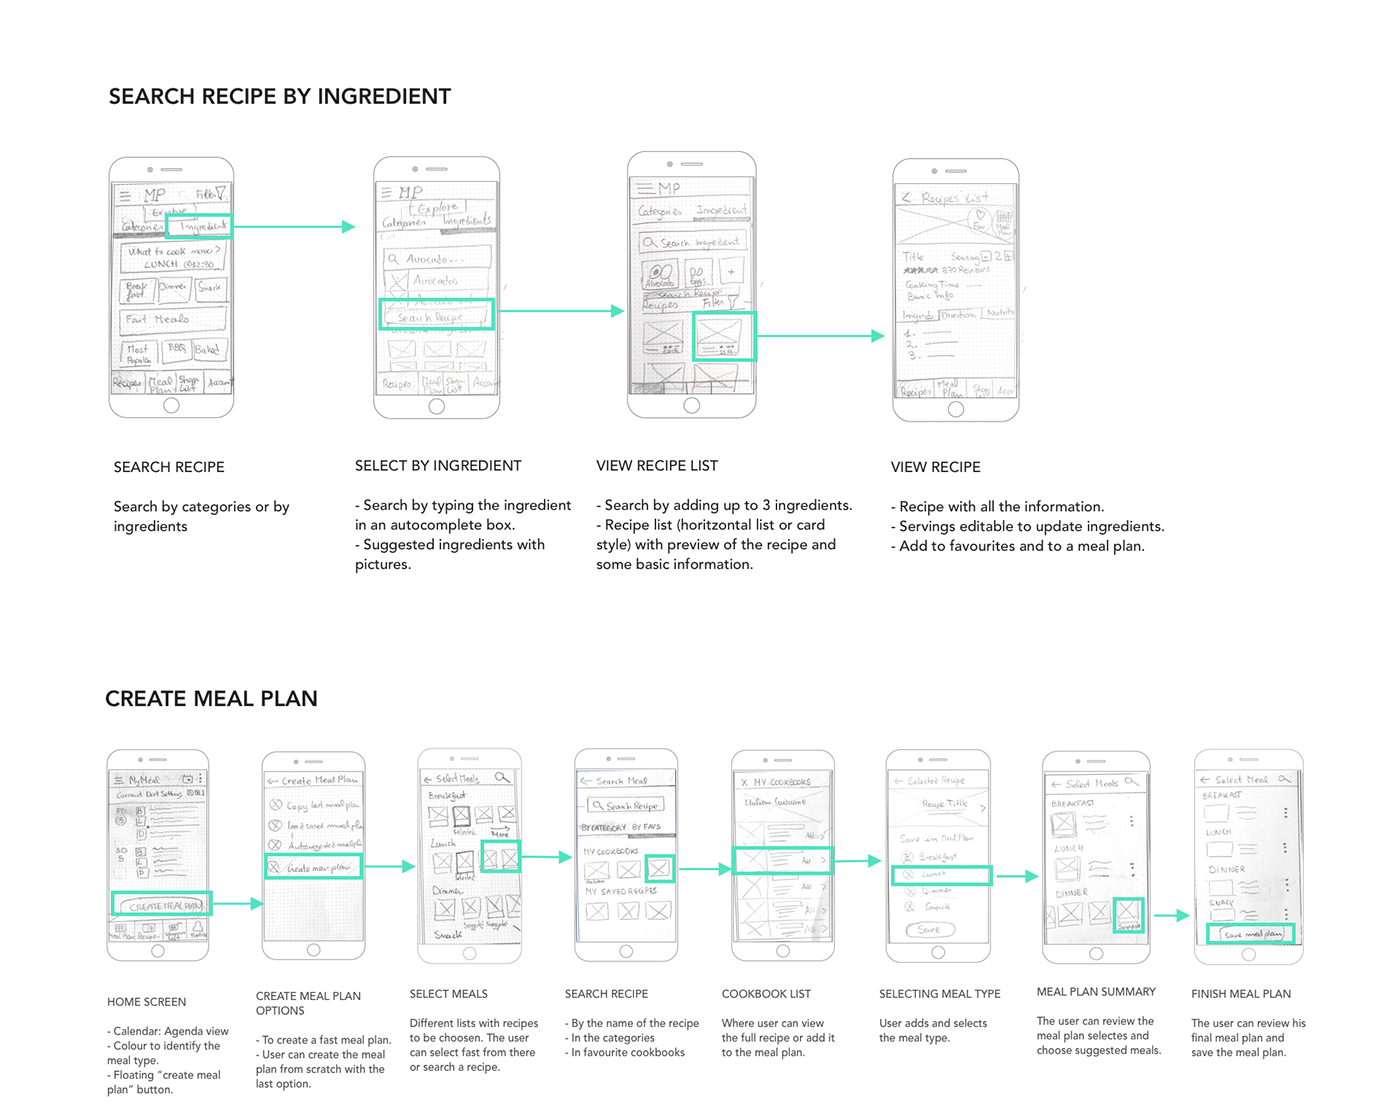
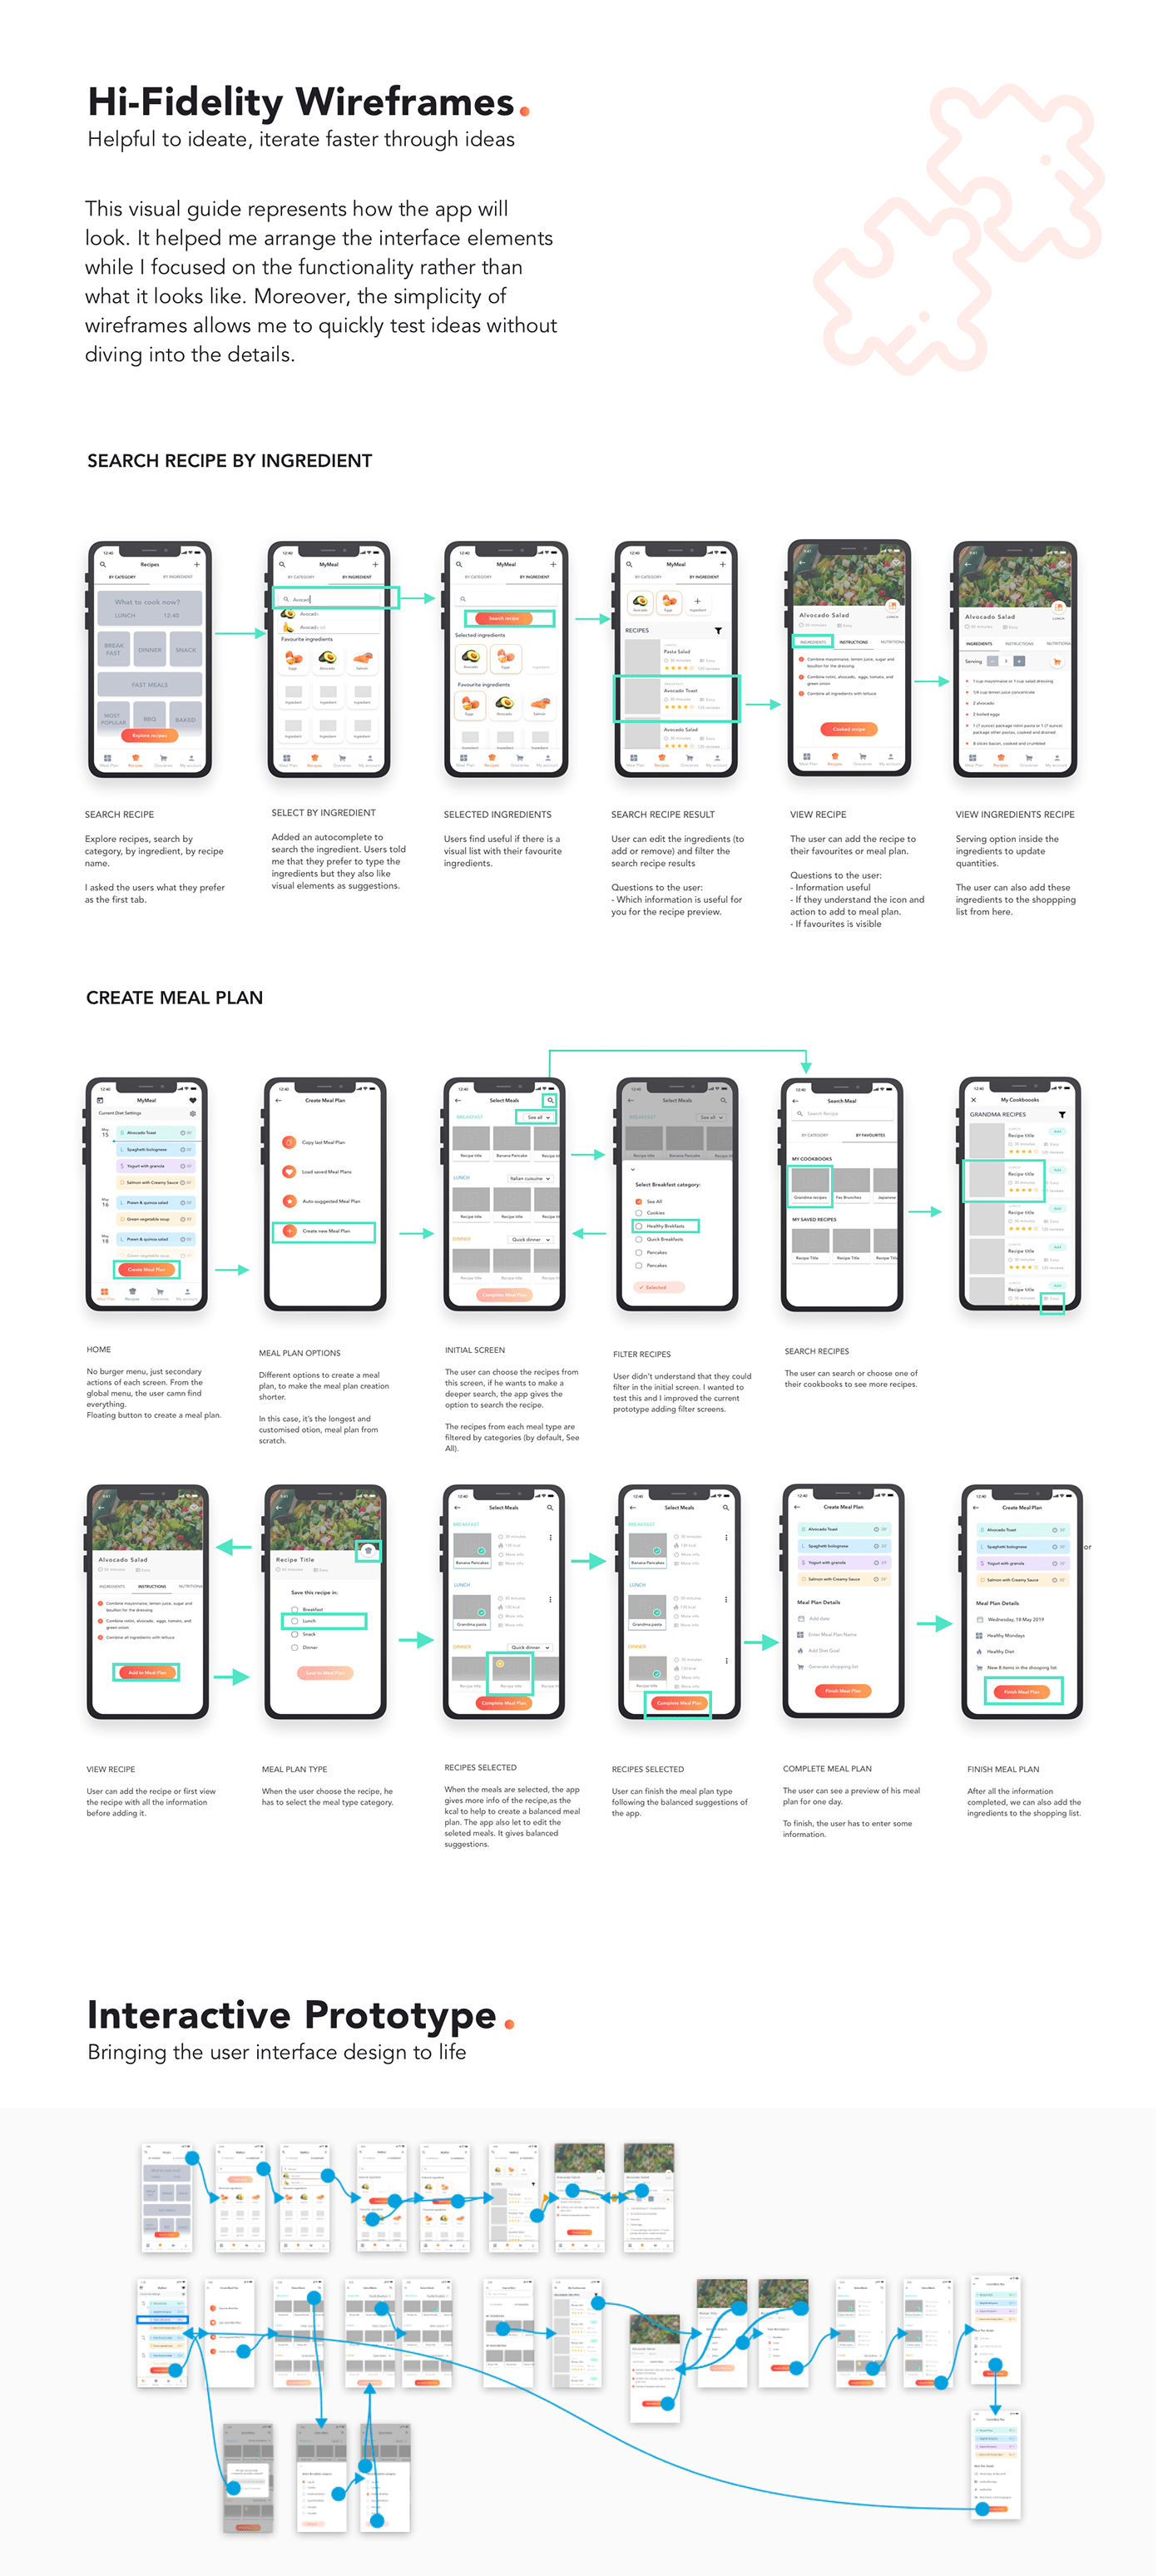
Low-fidelity (lo-fi) prototyping is a rapid and simple method for translating high-level design concepts into tangible, testable prototypes. The primary and most crucial purpose of lo-fi prototypes is to assess and test functionality rather than the product’s visual appearance.
Here are the basic characteristics of low-fidelity prototyping:
Source: Babich, N. (n.d.). Prototyping 101: The Difference between Low-Fidelity and High-Fidelity Prototypes and When to Use Each: Adobe Blog. Retrieved from https://blog.adobe.com/en/publish/2017/11/29/prototyping-difference-low-fidelity-high-fidelity-prototypes-use?gclid=CjwKCAjw2dG1BhB4EiwA998cqLIZDJZT2NE222rBF56mfy2qekvJrrEgYx-BpBEpIw5dIVExRrbxsBoChmQQAvD_BwE&ef_id=CjwKCAjw2dG1BhB4EiwA998cqLIZDJZT2NE222rBF56mfy2qekvJrrEgYx-BpBEpIw5dIVExRrbxsBoChmQQAvD_BwE%3AG%3As&s_kwcid=AL%213085%213%21708151097249%21%21%21g%21%21%2121541756247%21168366847569&mv=search&gad_source=1
Although we can describe a design with this level of fidelity as a high-fidelity wireframe, at this point, you are dealing more with a digital product mockup. Once you add functional user journeys and clickable areas to your high-fidelity wireframes, in practical terms, you are dealing with a functional prototype.
A high-fidelity wireframe, also known as a hi-fi wireframe, shows how a website or app will appear to the user. It includes all the content, stylistic elements, editorial copy, and branding to represent the finished product accurately. While it’s called a high-fidelity wireframe, it’s more like a digital product mockup at this stage. You’re essentially dealing with a functional prototype once you integrate functional user journeys and clickable areas into your high-fidelity wireframes.
Wireframing and Designing at the same time? Figma! Then prototype!
With Figma prototyping, you can create multiple flows for your prototype on one page to preview a user’s full journey and experience through your designs.
A flow is the network of frames and connections on a single page. A prototype can map out a user’s entire journey through your app or website or focus on a specific segment of it via its own flow. For example, your prototype covers all possible interactions on an eCommerce site. Within the prototype, you have flows for creating an account, adding items to a cart, and checking out.
Figma creates a flow starting point when you add your first connection between two frames. There are a few other ways to add a flow starting point to your prototype:
 in the Flow starting point section of the right sidebar.
When it’s time to test your designs, you can share the entire prototype or copy the link to a flow starting point.
Learn more about starting points and flows →
Note: A top-level frame can be part of multiple flows but can only have one starting point. Frames nested within a top-level starting frame can have connections that navigate the user around multiple flows. For example, log-in and sign-up buttons can be nested in the same starting point frame and connected to frames in separate flows for each experience.
 to create the connection.
You can create connections from multiple objects to the same destination frame simultaneously, saving you time and effort when building out your prototype flows. Select multiple starting hotspots on your canvas, then click and drag the icon to the destination.
Learn more about creating and editing connections in bulk →
.
Retrieved from https://help.figma.com/hc/en-us/articles/360040314193-Guide-to-prototyping-in-Figma