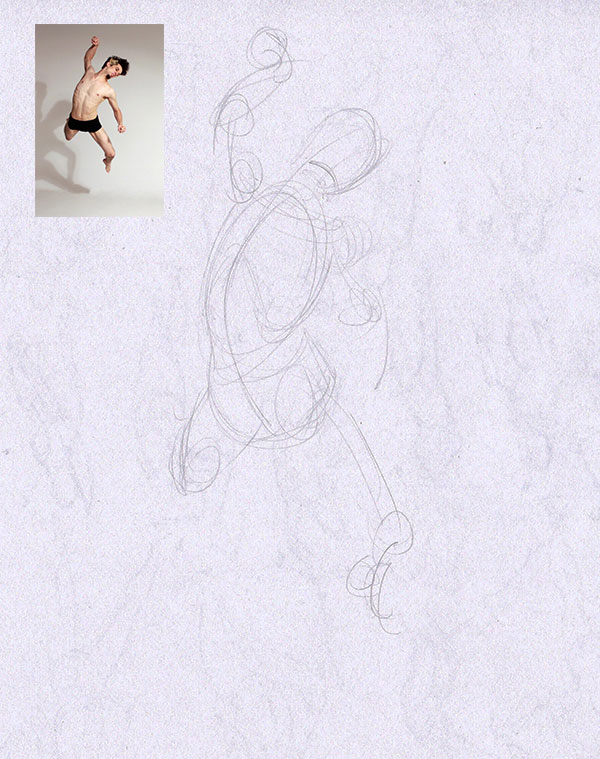
I start off my gesture with a rough line showing the main action of the figure, from the head through the torso down the legs. Pretty much everything else that comes after that is based off of this line. I would say typically the line of action tends to follow the centerline of the torso but, depending on the pose, not all the time. I follow that line with another line representing the arms. I feel that most figure’s gestures can be described with pretty much 2 lines. I also feel that those 2 lines are basically extreme shorthand versions of your initial impressions of what the figure is doing.
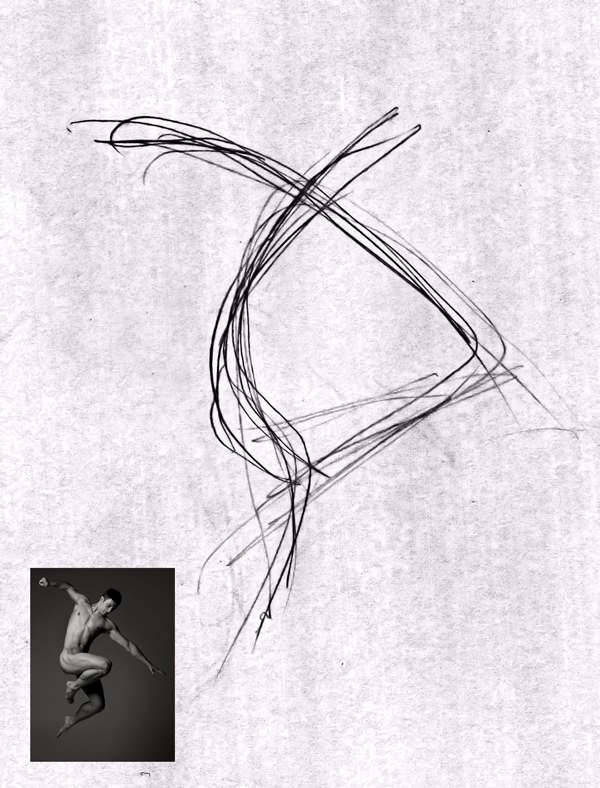
At this stage, things are obviously very abstract. I’m only concerned with trying to convey the figure’s action, I’m not thinking about anatomy and form.
I break my own rule a bit and add another line implying the figure’s lifted right leg. This line helps me visualize the left side compression of the torso and the stretching on the right side.
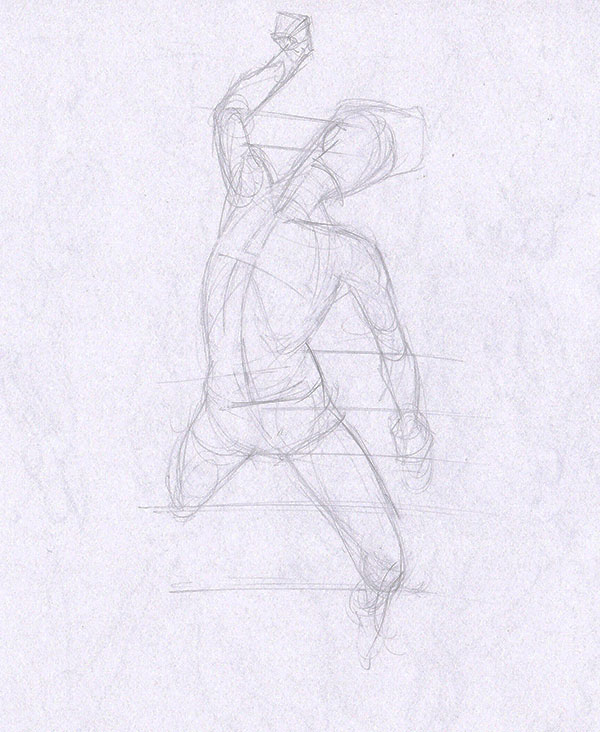
At this stage, I’m just working out the forms (still not being concerned with anatomy) and just trying to get it to look like the figure. I use an overhand grip for the early stages of a drawing. The process at this stage could be described as ice skating on paper because that’s almost what it feels like. This is probably about how far I would take things in a 1-minute pose.

You can kind of make out construction lines and a bit of anatomy at this stage. I’m still using the same drawing method as the previous stage…using the underhand grip and zipping my way through the figure. This is probably about a 2-minute pose for me.
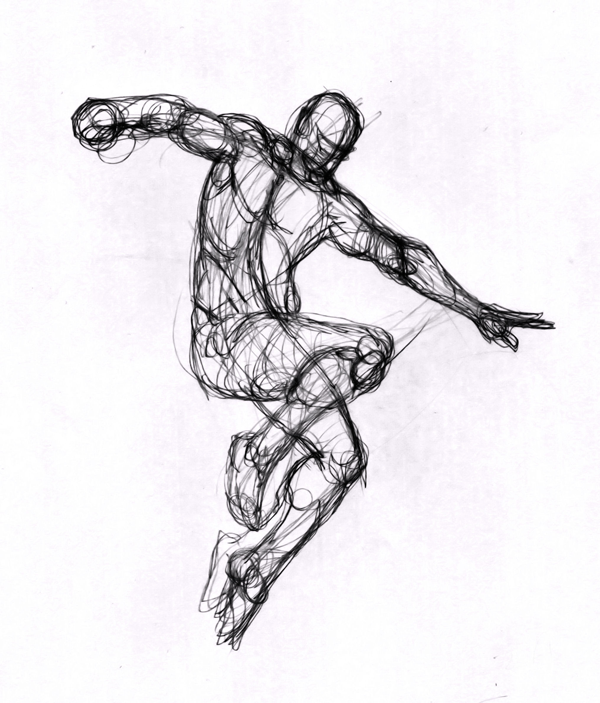
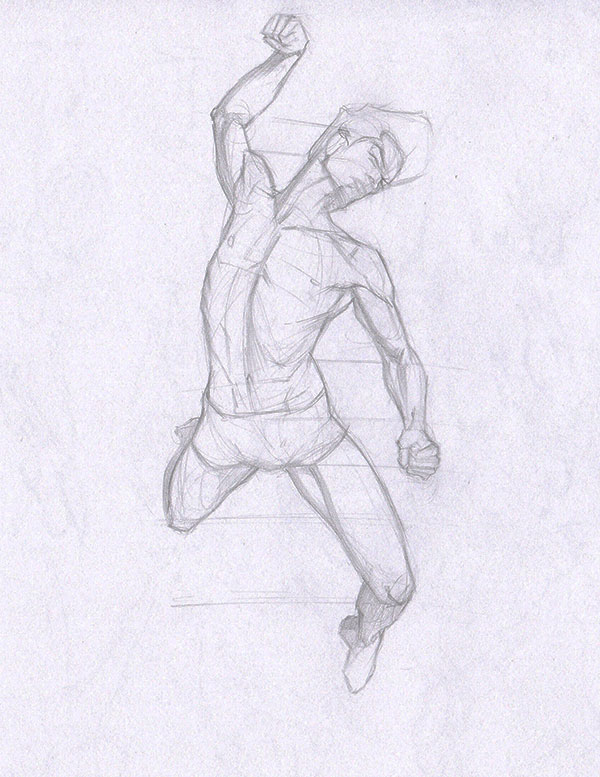
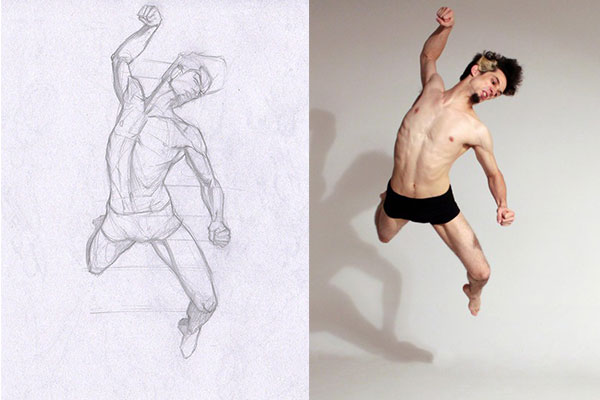
I change my grip to my usual drawing grip and start refining the figure and try to fully realize the anatomy. I do this by using simple shapes and anatomy landmarks. You can see I’m really striving to emphasize the twist of the torso here. As well as get the structure of the head, hands, and feet.
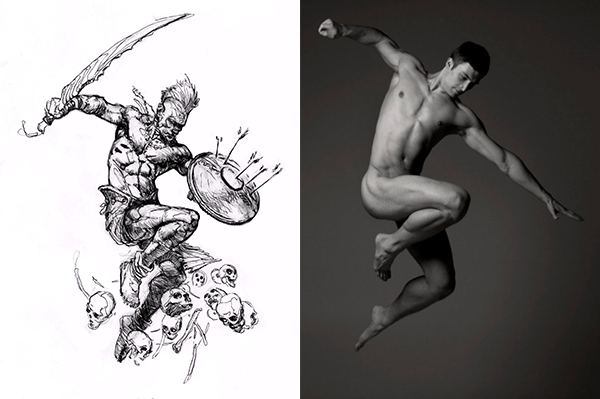
In my opinion, this stage is kind of past the point of it being a gesture drawing. This might be the early stages of an anatomy study or an underdrawing for a finished piece. With that said, I can see this figure being the starting point to a superhero type character or maybe some kind of cyberpunk riding a hoverboard or whatever. You can change and alter this to whatever you want to.
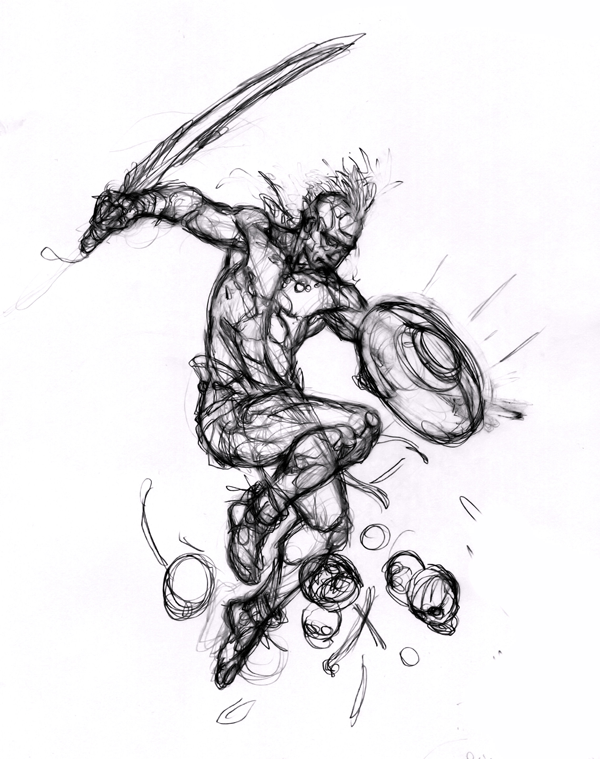
To illustrate my previous point I add a few fantasy elements to the figure. He could be a warrior type leaping and attacking a large creature or a group of warriors. I’m sure most of us are familiar with this type of scenario.


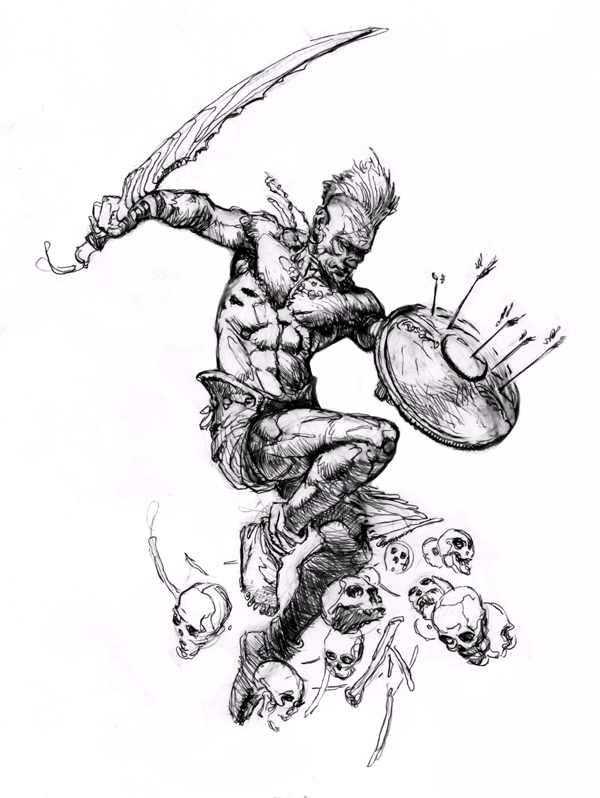
I add a light source and do a bit of rendering. I want to add that I’m generally aware of the lighting going on when I’m doing these but, it doesn’t really factor into my gesture drawing process very much. However, there are instances (most of the time during life drawing classes) where I will see a cast shadow that does a great job of describing the form underneath and I’d draw that on the figure. Those instances tend to be during 2 and 5 minute poses though.
I’m also aware of the negative space and will use it sometimes as a placeholder as I’m zipping through the figure. I would do this type of thing once I have my main lines of action drawn. I find it can be easier drawing the shape of the space between the legs, for example, than drawing out the legs themselves. I find this technique pretty useful, particularly when I’m doing timed poses. Once you’re proficient enough with the figure, you could literally construct a figure using nothing but negative space, it’s actually pretty cool.
Hey guys,
A while back I asked up-and-coming artist Razvan to make a walkthrough of his technique and provide some tips on how he handles gesture drawing. So here it is, enjoy!
1st step: Getting the gesture of the figure:
First start with the overall gesture of the figure. In this step don’t worry so much about proportions and anatomy, and focus on getting the figure some flow and movement. I first start with the bean and find the center line on the torso and pelvis. Then I place some gesture lines for the legs and hands. I try to avoid placing straight lines for the feet and hands and exaggerate the pose a bit because it’s going to stiffen up as you go further with it.
2nd step: Refining the base
In this step I try and fill out the anatomy with simple shapes and I also take the time to measure out the proportions and see where they should be in relation to other body parts. I measure how far down and up the elbows go, how wide his shoulders are compared to his torso, etc.
3rd step: Final refinements & rendering
I just try and render out the anatomy best as I can, but still have a lot to learn here. Anatomy studies help a lot, for example knowing the layering order of the muscles, the pectoralis major is over the biceps and the deltoid comes over both of them.
You can check out Razvan’s work on conceptart.org