Posted on: Sep 09, 2019
tag: art
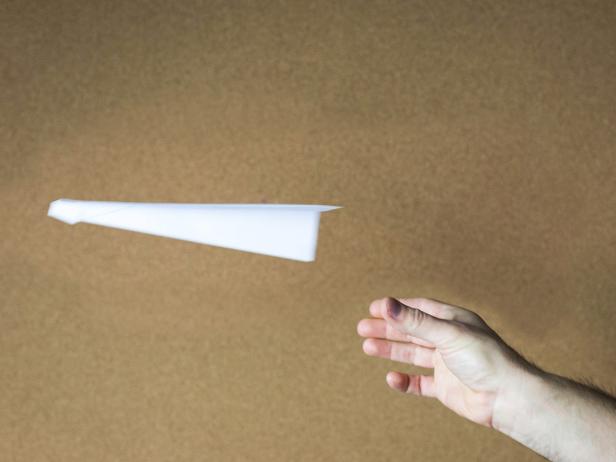
Paper Airplane Assignment: Fold a paper airplane, place it in front of you & draw from direct observation as accurately as you can. ADD FULL SHADING Possible Medium: drawing pencil
Sam Henderson
For best results use a flat, thin-edged ruler. Make good creases along each edge. Adding double stick tape to the inside of the body keeps the wings from separating in flight.
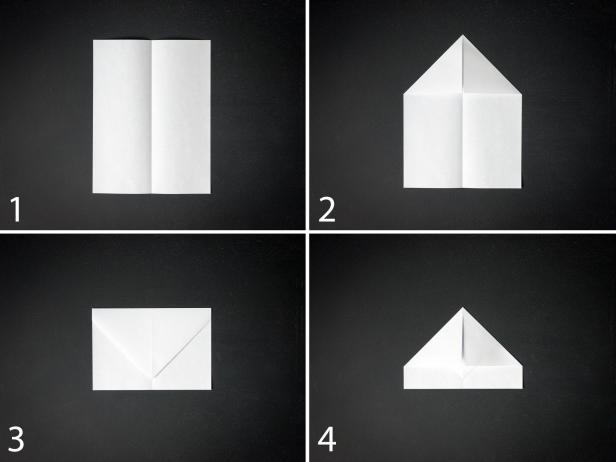
The Dart
The most basic version. A simple standard that everyone should know how to make.

- Fold the paper in half vertically.
- Unfold the paper and fold each of the top corners into the center line.
- Fold the top edges into the center line.
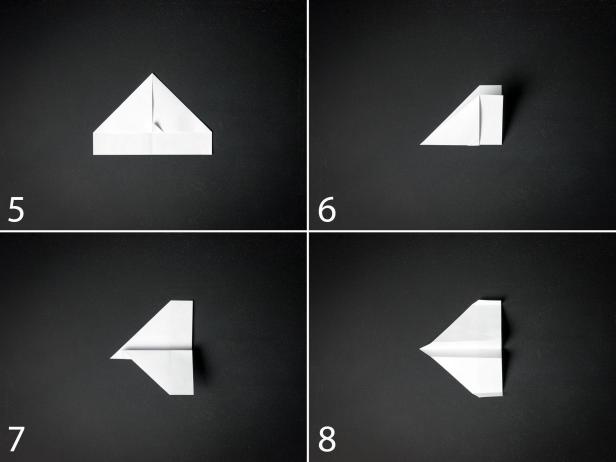
- Fold the plane in half toward you.
- Fold the wings down, matching the top edges up with the bottom edge of the body.
- Add double stick tape to the inside of the body. The finished plane should look like this.
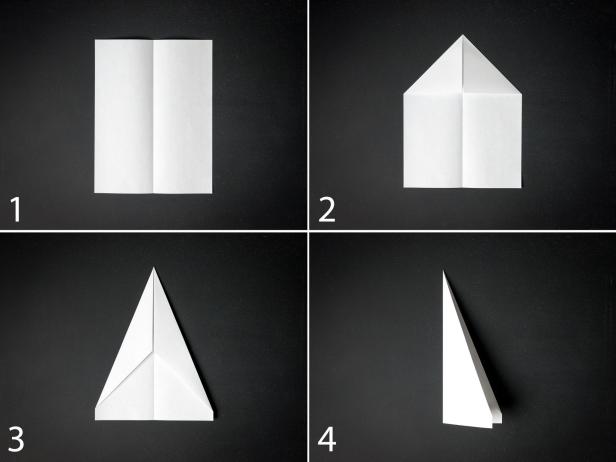
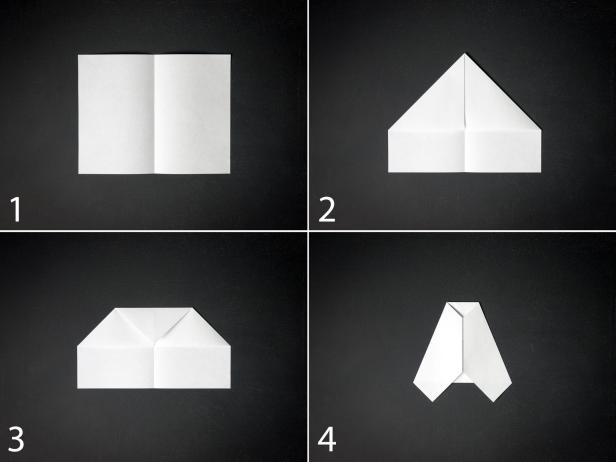
The Stealth
This one is built for distance, plus it just looks cool.
- Fold the paper in half vertically.
- Unfold the paper and fold each of the top corners into the center line.
- Fold the peak toward you and 3/4” from the bottom of the paper.
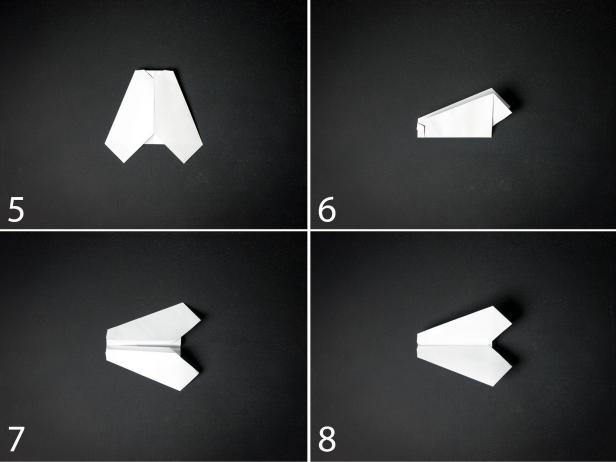
- Fold both top corners into the center line.
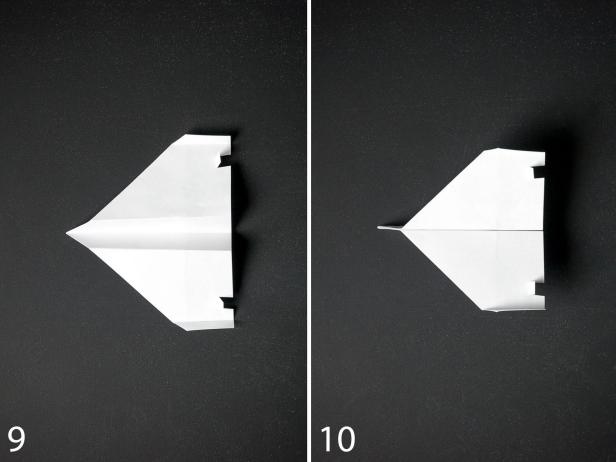
- Fold the remaining tip over the two flaps at the center line to lock them in place.
- Fold the plane in half away from you.
- Fold the wings down 1” from the bottom of the plane.
- Fold up the sides of each wing 1/2” tall.
- Cut two small slits at the back of each wing. Fold up the tabs.
- Add double stick tape to the inside of the body. The finished plane should look like this.
The Bumble
Built correctly, this bee-like beauty stays in the air for a long time.
- Fold the paper in half horizontally.
- Unfold the paper and fold each of the top corners into the center line.
- Fold the peak down to meet the edge of the previous fold.
- Fold the upper sides into the center line.
- Fold the top edge 1/2” away from you.
- Fold the plane in half towards you.
- Fold the wings down 1/2” from the bottom of the plane.
- Add double stick tape to the inside of the body. The finished plane should look like this.
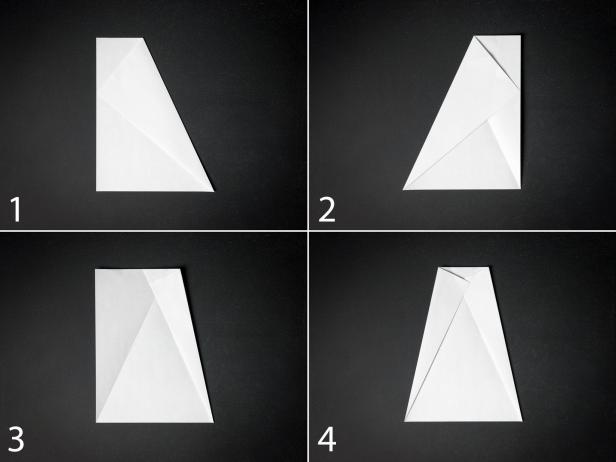
The Hunter
Count on speed and distance from this sleek plane.
- Fold the paper in half vertically.
- Unfold the paper and fold the top edge down 2”.
- Fold the top edge down again to meet the bottom of the previous fold.
- Fold the top edge down one more time to meet the bottom of the previous fold.
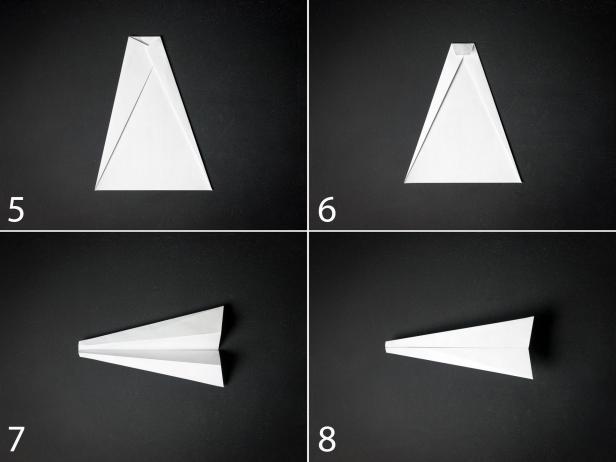
- Fold the top edges down and away from you to the center line on the back of the paper.
- Fold the plane in half towards you.
- Starting at the top of the thick nose of the plane, fold the wings down 1/2” in the front and slightly angled to 1 1/2” in the back. Fold up the edges of the wings 1/2”.
- Add double stick tape to the inside of the body. The finished plane should look like this.
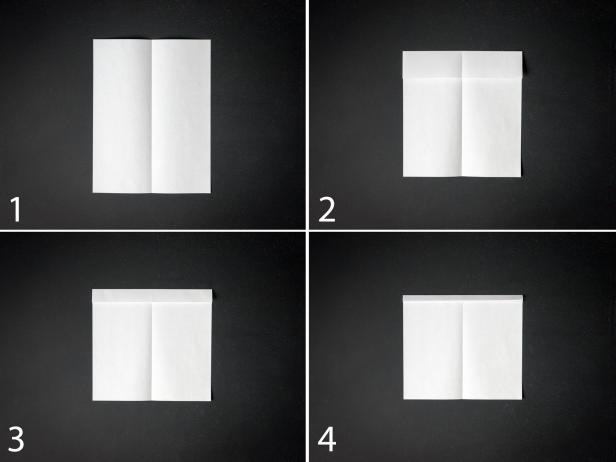
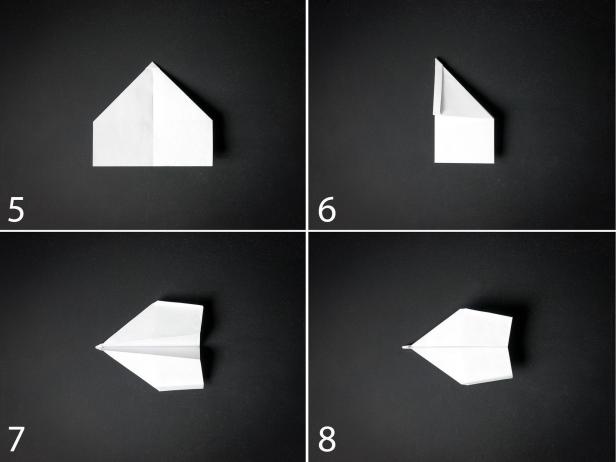
The Bullnose
This plane is deceptively fast and stays aloft for quite a distance.
- Fold the top right corner over to the left side, making a fold from the top of the paper to the bottom right corner.
- Unfold the paper and repeat for the left corner.
- Unfold the paper again and fold the top right corner over to meet the crease made from the first fold.
- Fold the left corner over to meet the crease from the second fold.
- Fold the top right edge over to meet the edge of the fold from step 3. Repeat for the other side.
- Fold the top edge down and towards you to meet the point where the right and left layers cross.
- Fold the plane in half away from you. Staring at the nose, fold the wings down at a slight angle, 1/2” in the front to about 2” in the back.
- Add double stick tape to the inside of the body. The finished plane should look like this.
Origami or folded paper, inspired by this observational drawings by Sean Dooley, a graduate of Savannah College of Art and Design:
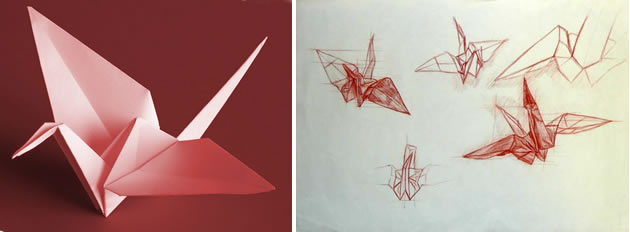
Folding paper can create stunning shadows and a mesh of intriguing angular lines. This example is one that is included in our list of substitute art lessons, and can involve students first constructing origami, before producing observational drawings in a range of different media.
Code
Art
Design
UI/UX
Video
Projects
Social