by Grace Fussell 22 Feb
 What You’ll Be Creating
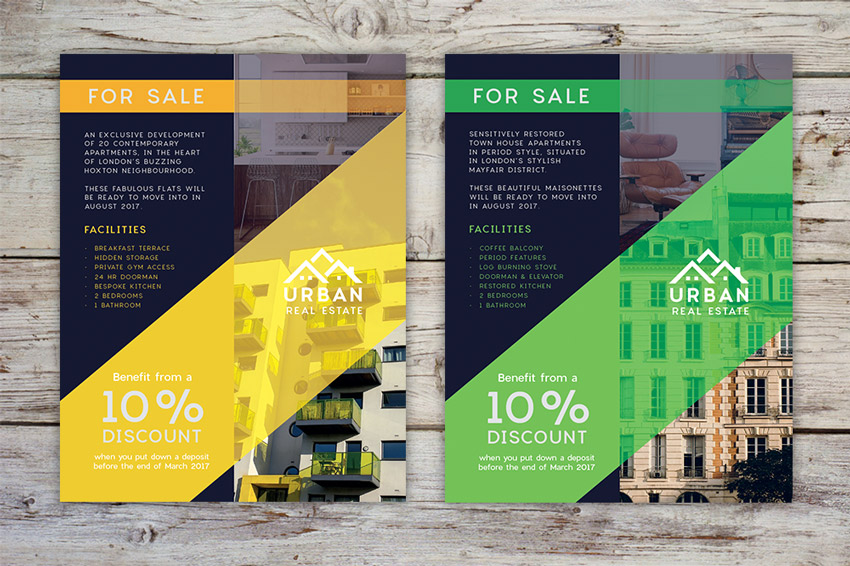
Looking to entice customers to view a property on your books? This stylish real estate flyer template has a versatile design which can be easily adapted to your own content, photos, and branding. Suitable for beginners to InDesign, this tutorial will take you through the steps of creating the flyer from scratch and setting up the design ready for printing.
Ready to sell that house? Awesome, let’s get started…
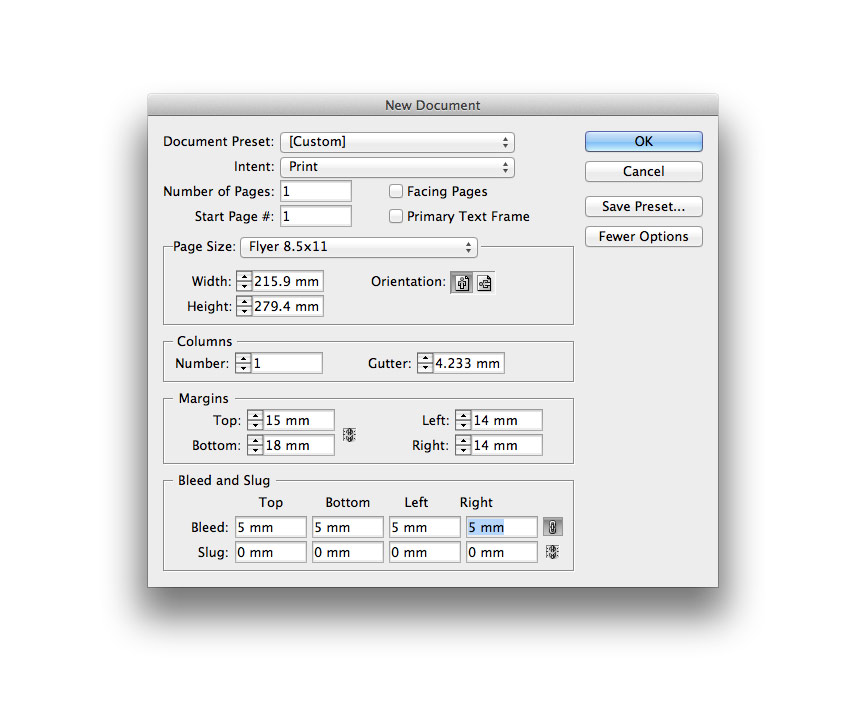
Open up Adobe InDesign and head up to File > New > Document.
Set the Intent to Print and Number of Pages to 1, and uncheck Facing Pages to set up a simple one-page document.
Set the Width of the page to 8.5 in (215.9 mm) and Height to 11 in (279.4 mm), which is a standard flyer size.
Set the Top Margin to 15 mm, Bottom to 18 mm, and Left and Right Margins to 14 mm. Add a Bleed of 5 mm to all edges of the page, and click OK to create the document.
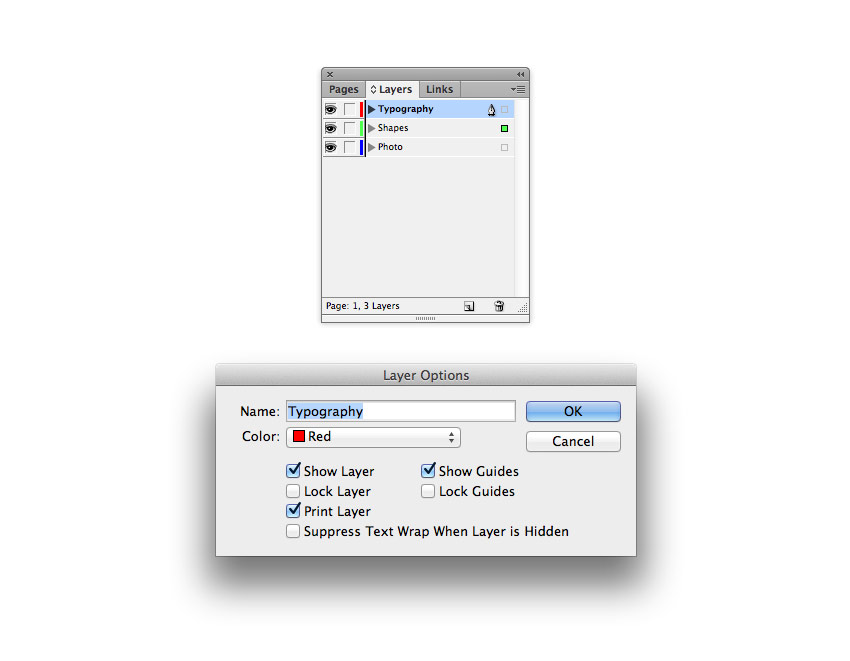
Expand the Layers panel (Window > Layers) and double-click on the default Layer 1 name in the panel to open the Layer Options window. Rename the layer Photo and click OK.
Click on the Create New Layer button at the bottom of the panel to create a second layer. Rename it Shapes. Create a third and final layer and rename this Typography.
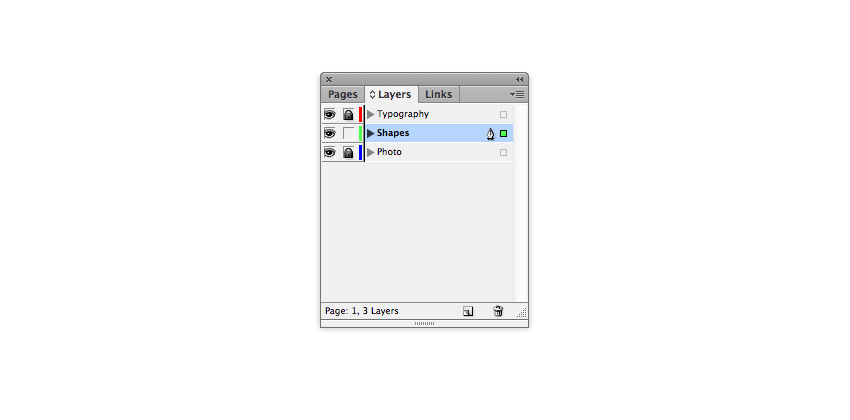
Lock both the top Typography layer and Photo layer at the bottom, leaving the Shapes layer unlocked and selected.
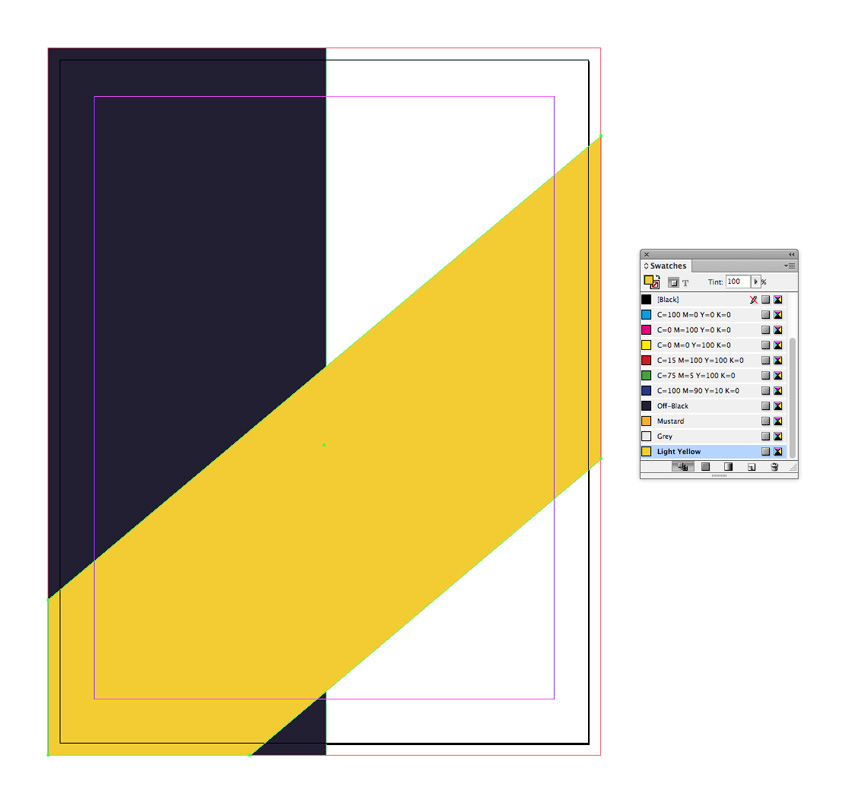
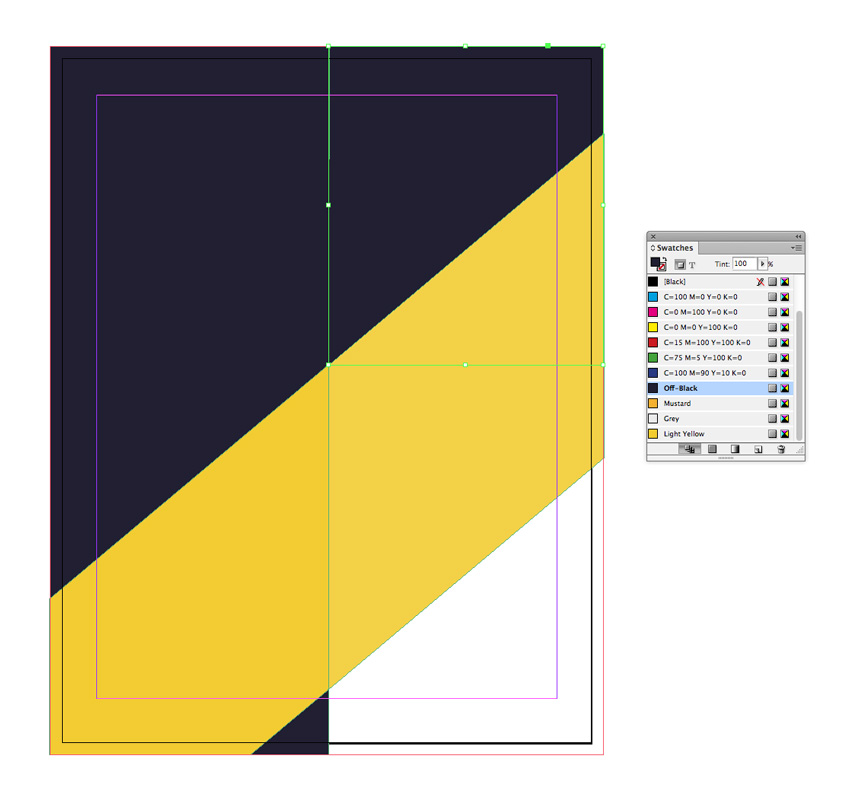
This flyer design will need a four-color palette, with a dark neutral base color, a light neutral color for text, and two variants, light and dark, of a punchier color.
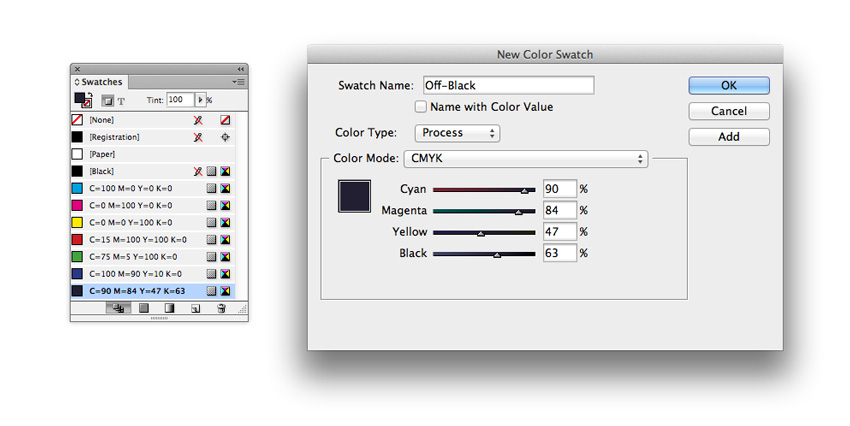
To create your palette, expand the Swatches panel (Window > Color > Swatches), and click on the New Swatch button at the bottom of the panel.
First, let’s create our dark base color. Name the swatch Off-Black, and set the Type to Process and Mode to CMYK. Set the levels to C=90 M=84 Y=47 K=63, and click Add and then OK.
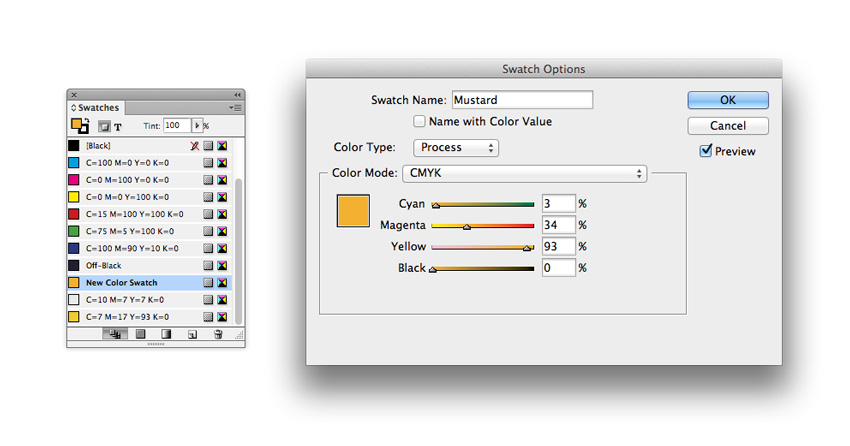
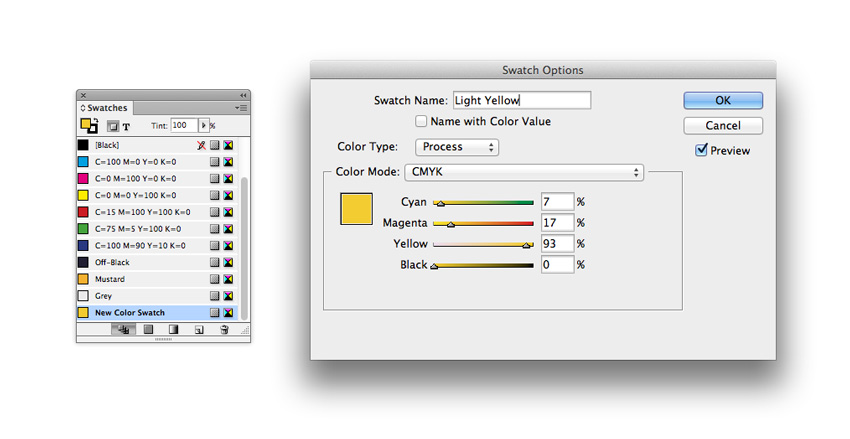
Create a further three new CMYK swatches using the same process.
Here, I’ve created a pale swatch named Grey, C=10 M=7 Y=7 K=0, and two yellow swatches: C=3 M=34 Y=93 K=0 (‘Mustard’) and C=7 M=17 Y=93 K=0 (‘Light Yellow’).
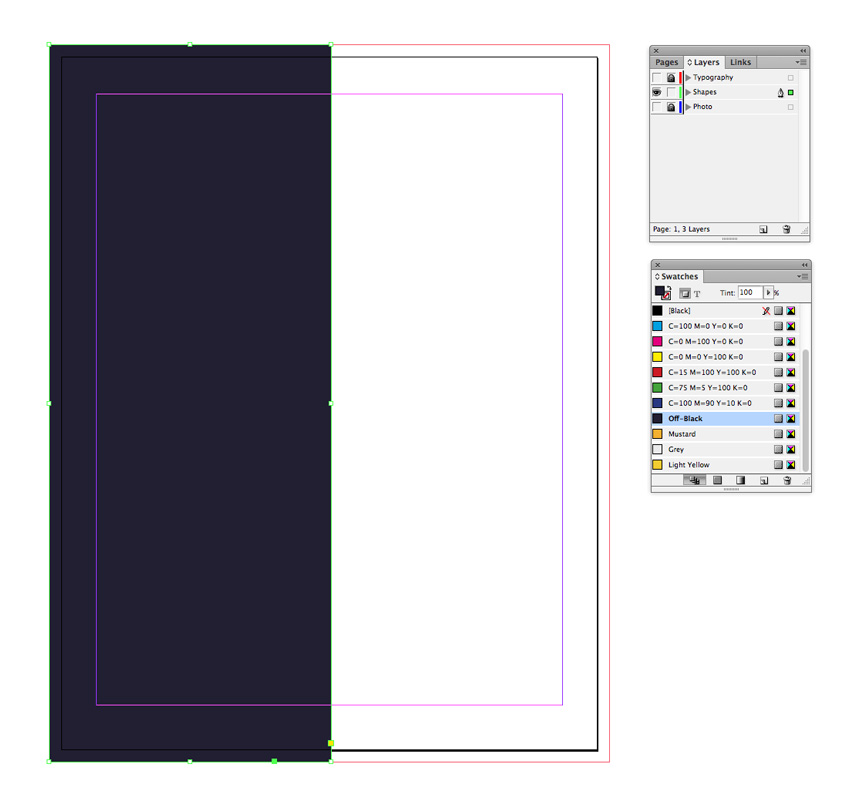
Take the Rectangle Tool (M) and drag across the page, extending it up to the bleed on the top, left and bottom edges, and across to roughly the halfway point of the page. Set the Fill to your Off-Black swatch.
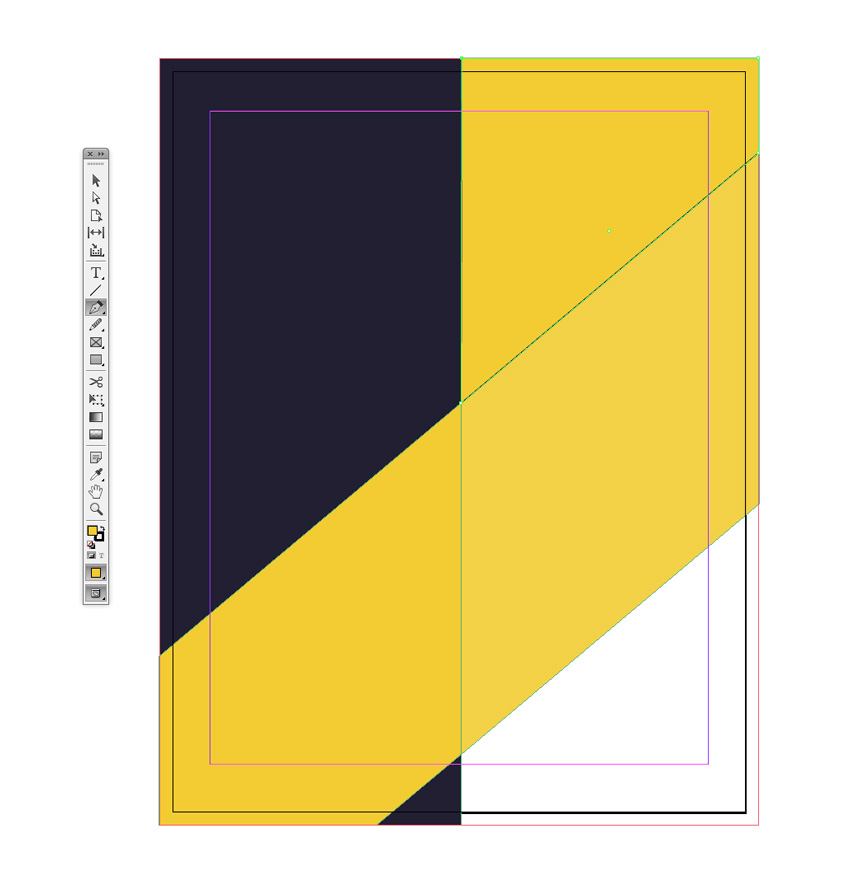
Select the Pen Tool (P) and use it to create a diagonal shape extending across the page, from the bottom-left corner to the top of the right side of the page. You want the ribbon to be reasonably thick, with perfectly parallel lines.
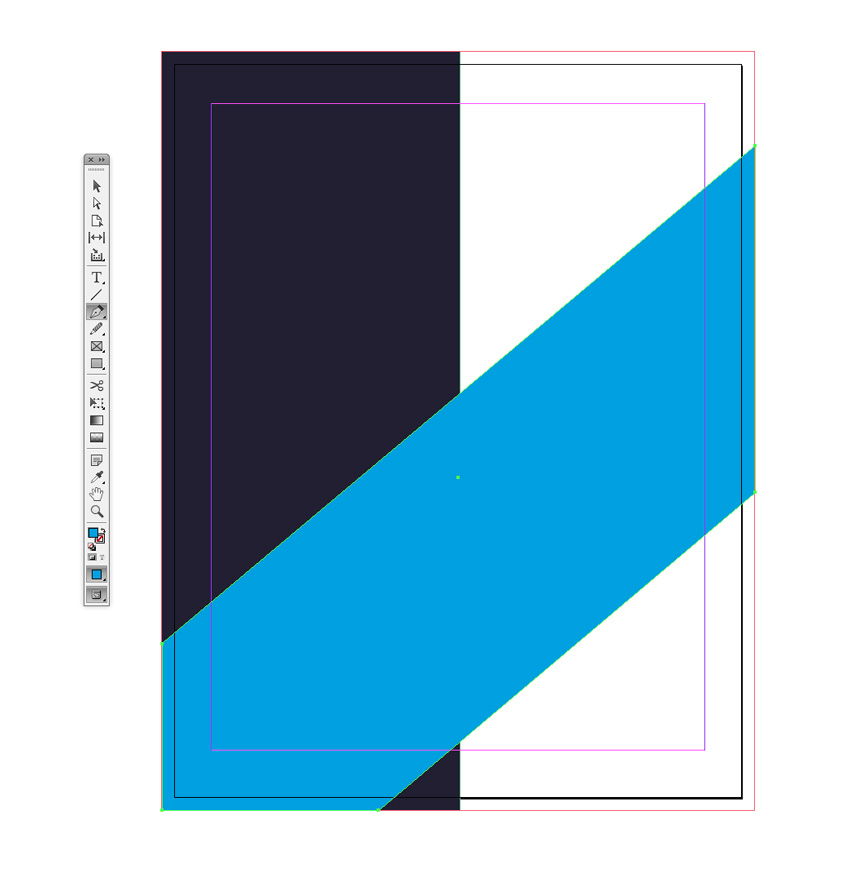
Once you’ve created the rough shape and want to tweak the anchor points, you can use the Direct Selection Tool (A) to select individual points and move them around using the arrow keys.
Once you’re happy with the shape, adjust the Fill to Light Yellow.
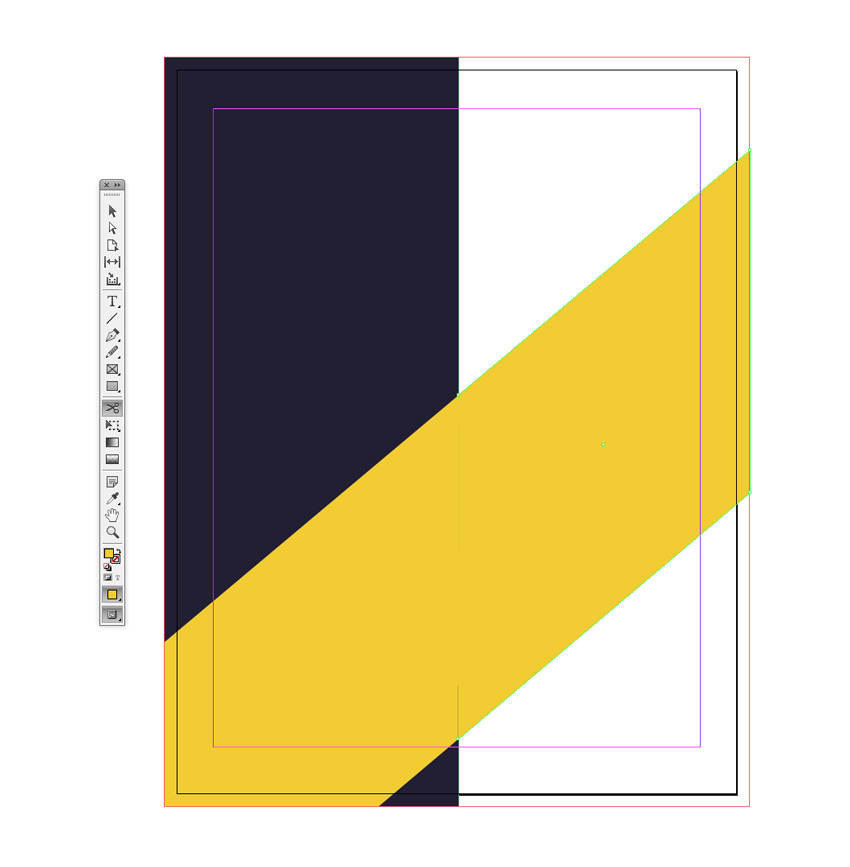
Take the Scissors Tool (C) and snip once where the top of the yellow shape meets the edge of the black rectangle, and once again where the shapes cross over at the bottom. This will split the yellow shape into two sections.
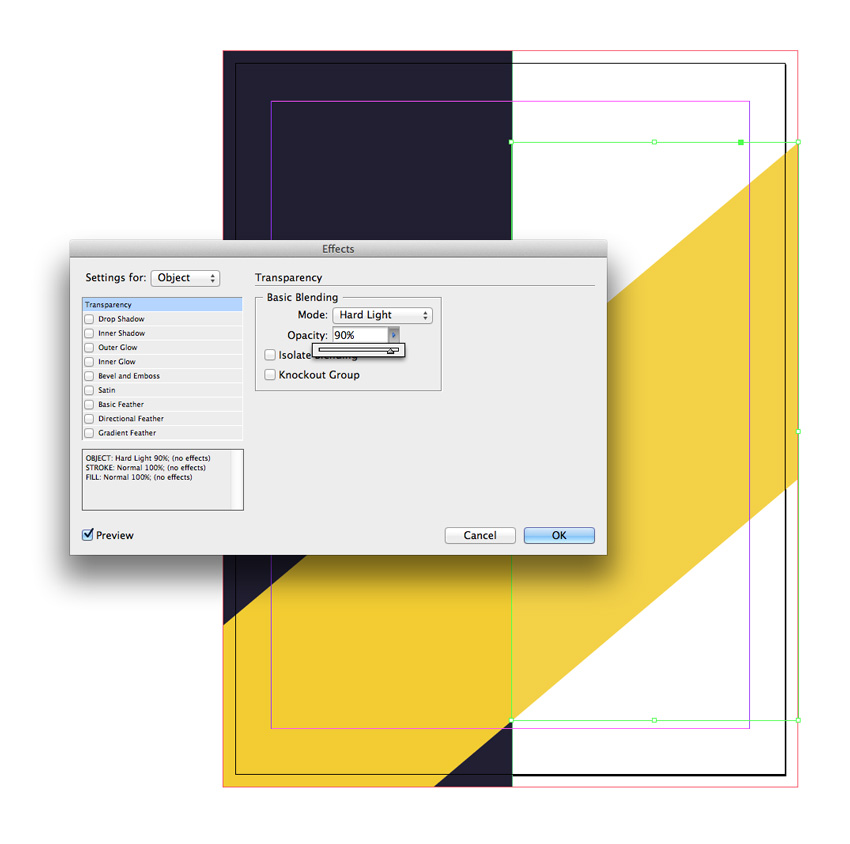
Select the top-right half of the yellow shape and go to Object > Effects > Transparency. Choose Hard Light from the Mode menu, and pull down the Opacity to around 90%. Click OK.
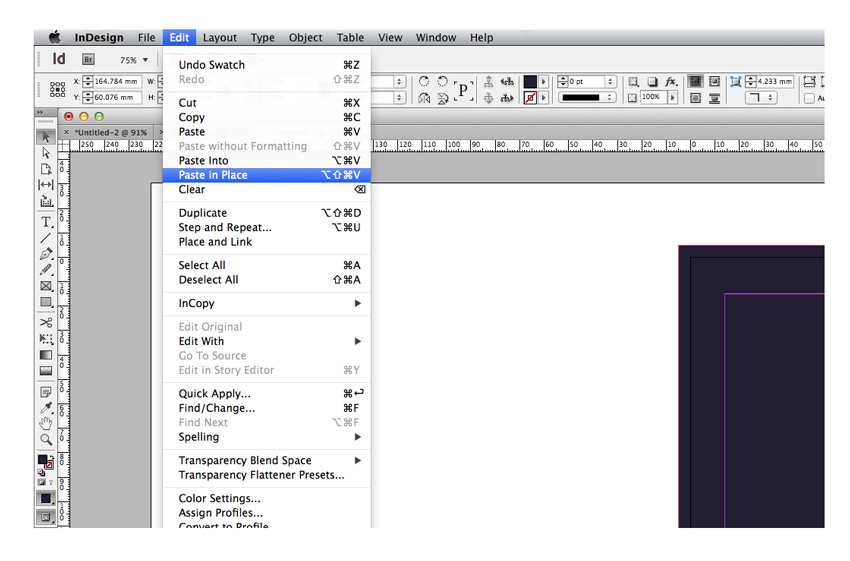
Take the Pen Tool (P) again and zoom into the top-right corner of the page. Trace the edges of the blank space that remains, creating a sort of triangle shape.
Set the Fill of this new shape to Off-Black.
Edit > Copy the triangle shape, and Edit > Paste in Place.
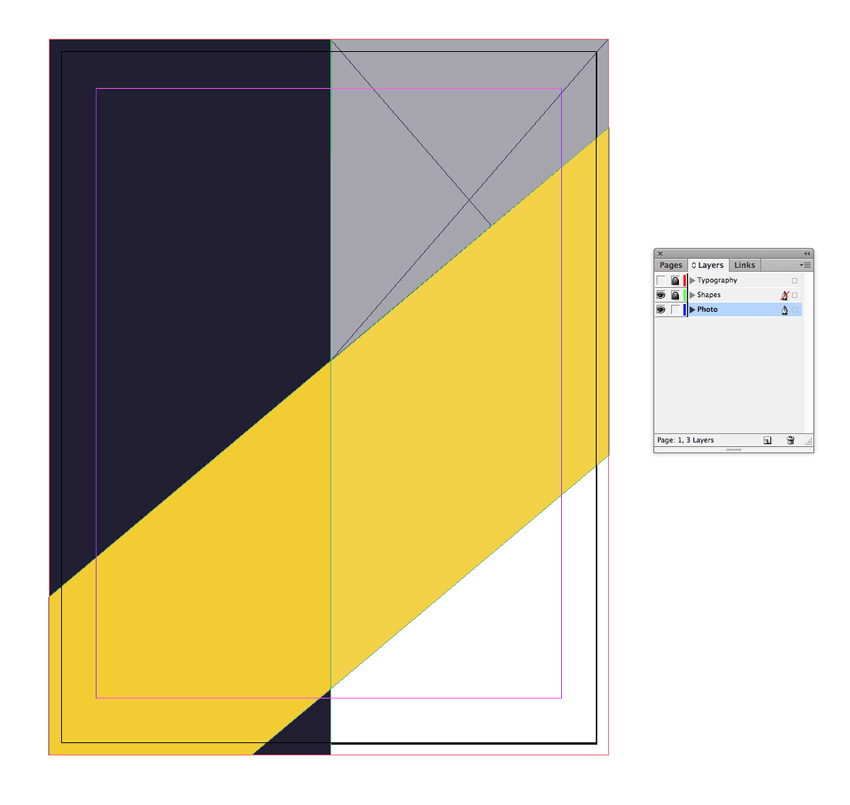
Return to the Layers panel and click on the small arrow to the left of the Shapes layer’s name, to expand the layer. Select the top ‘polygon’ element…
… and drag it down into the Photo layer below. You’ll have to unlock this layer first to do so.
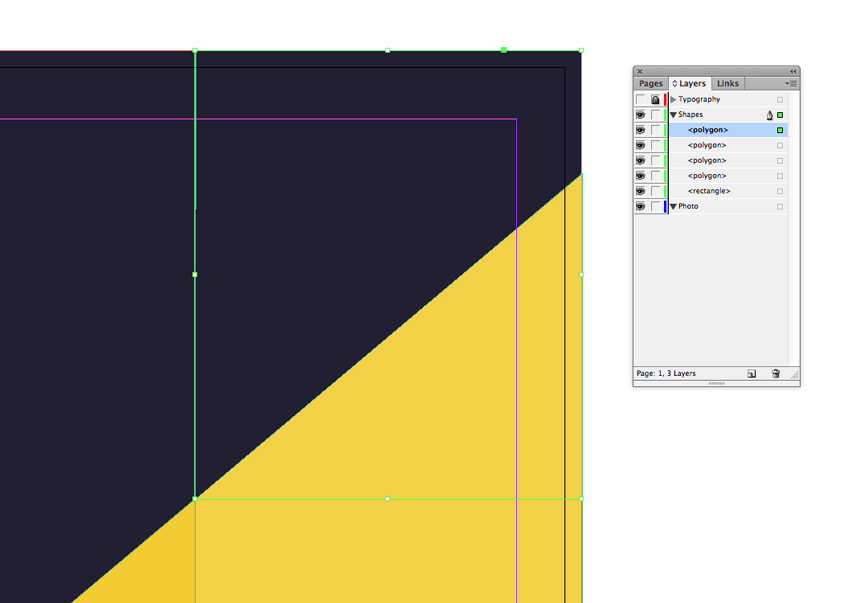
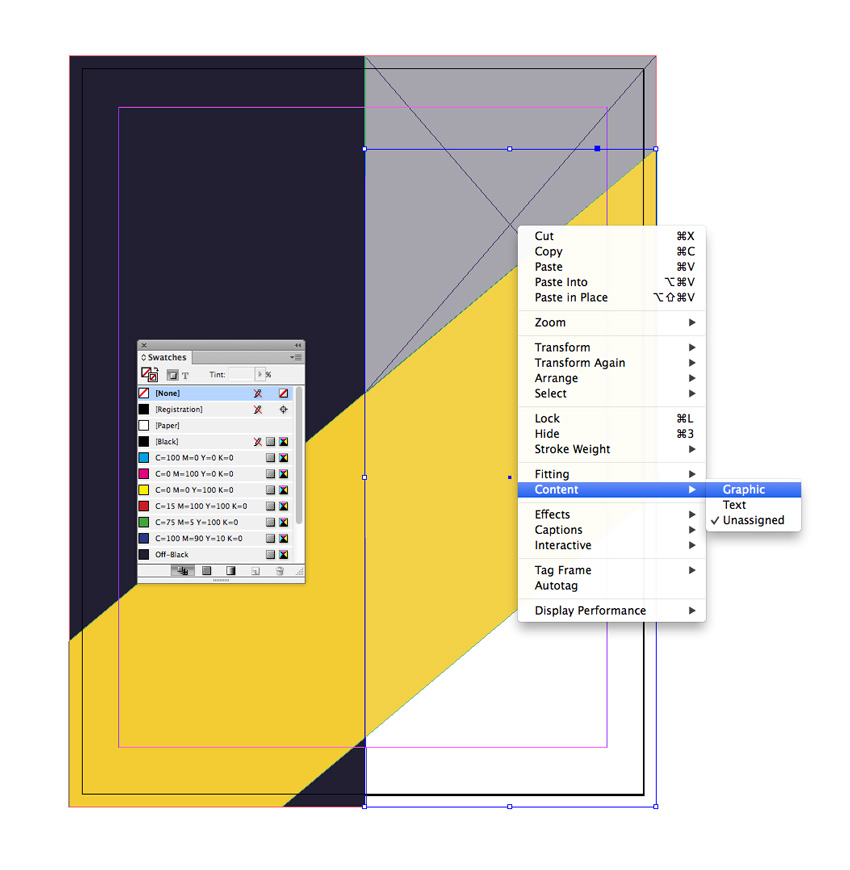
Then, with the moved triangle shape still selected, Right-Click (Windows) or Control-Click (Mac) > Content > Graphic to turn the shape into an image frame. We’ll come back to this a bit later.
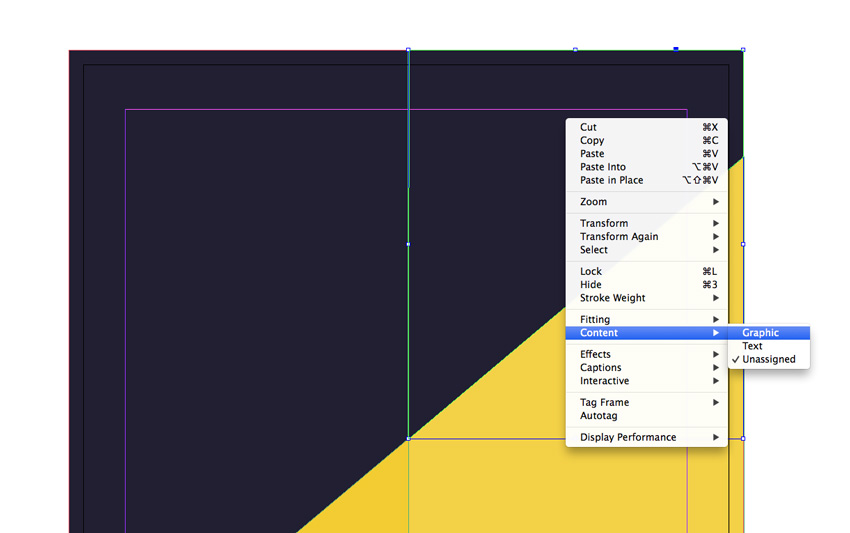
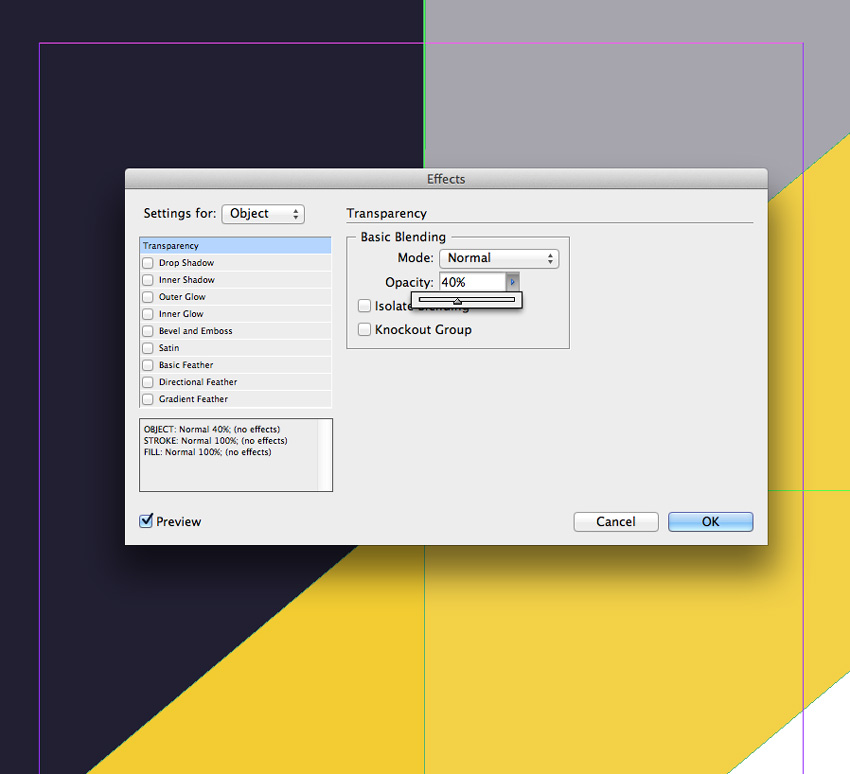
Lock the Photo layer and return to the Shapes layer above. Select the triangle shape that’s sitting on this layer, and go to Object > Effects > Transparency. Reduce the Opacity to 40%, and click OK.
Lock the Shapes layer and unlock the Photo layer below.
Take the Pen Tool (P) and create another new shape. This time, focus on the bottom-right section of the page, creating a shape that fills the bottom-right gap as well as the top-right half of the yellow rectangle sitting on the layer above, This will create a rectangle shape with a triangular top.
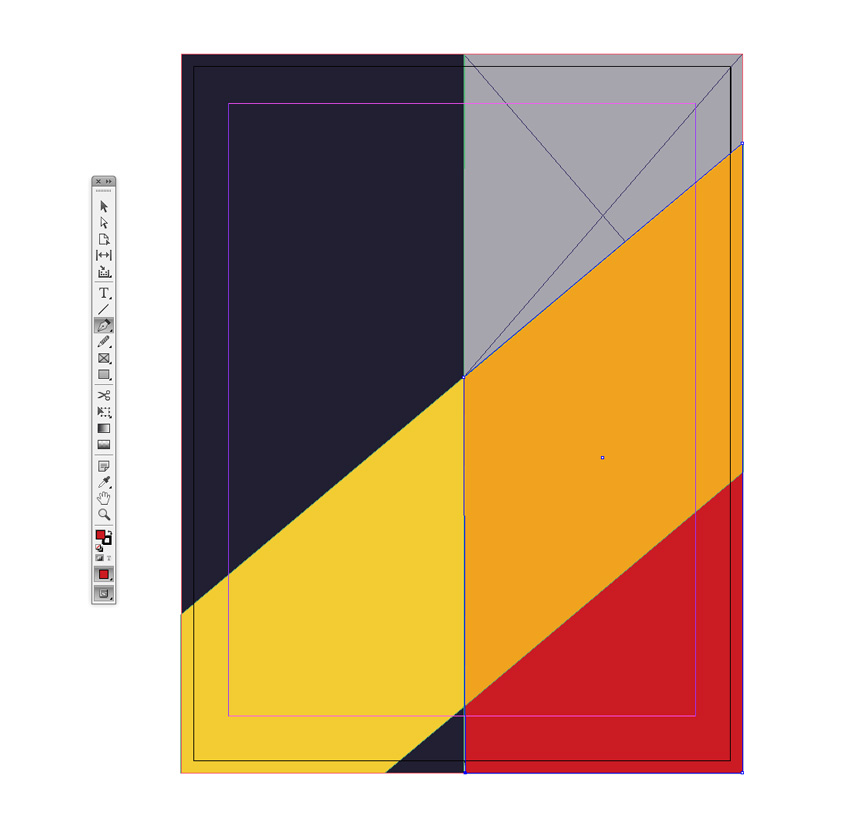
Set the Fill of the shape to [None] and then Right-Click (Windows) or Control-Click (Mac) > Content > Graphic to transform the shape into an image frame.
With your new image frame still selected, go to File > Place. Choose an image of the property you want to feature, and click Open. Arrange [the image](https://pixabay.com/en/building-sky-architecture-
Open your logo up in Adobe Illustrator or a different vector-editing program, and adjust the Fill of the design to White. Then Edit > Copy the vector.
Return to your InDesign document and lock the Photo layer. Unlock the top layer, Typography. Edit > Paste the vector logo directly onto your document.
Position the logo over the top-right half of the yellow shape.
I’ve added text below the logo design to complete the brand, setting the Font to Charlevoix Pro, and adjusting the Font Color to [Paper] from the Swatches panel.
Take the Rectangle Tool (M) and create a wide, squat rectangle across the top of the page, extending over to the halfway point of the page. Rest the top edge of the shape against the top margin, and set the Fill to Mustard.
Select the rectangle shape and Edit > Copy, Edit > Paste, moving it over to the right side of the page, meeting the right edge of the original rectangle shape. Go to Object > Effects > Transparency. Set the Mode to Hard Light and reduce the Opacity to 70%.
Create a text frame using the Type Tool (T), and type in ‘FOR SALE’ or whichever header you’d like to use. Set the Font to Charlevoix Pro Medium, Font Size to 37 pt, Tracking to 110 and Font Color to Grey.
You can now start to add more text to your flyer design using the Type Tool (T).
Place text frames below the ribbon header, resting them against the left margin. Set the text in Charlevoix Pro, Size 12 pt, and increase the Tracking to 130 for a contemporary look. Set the Font Color to Grey.
Add more details about facilities, setting the text in Light Yellow. You can create bullet points by highlighting text and then clicking on the Bulleted List button in the Character Formatting Controls panel at the top of the workspace.
You can also place text over the bottom-left corner of the page. This is a good place to format a call-to-action or attention-grabbing offer.
Here I’ve set text in Charlevoix Pro, as before, and in the Grey swatch for subtle contrast against the yellow background.
It’s simple to change the color and branding of your flyer. To adjust the color scheme, create a new pair of light and dark color swatches from the Swatches panel. Here I’ve created a pale apple green and a slightly darker counterpart.
Then unlock the Shapes layer and select the top ribbon rectangles and large diagonal shape sections. You can adjust the Fill color of these to give your flyer a fresh look.
(To recreate the look below, I’ve used an image of a modern living room and this photo of a formal city street.)
You can also experiment with the typography. Try changing the font from a clean sans serif like Charlevoix Pro to a more traditional serif like Garamond to make your flyer feel more aspirational and classic.
To export your flyer ready for sending to print, head up to File > Export.
From the Format drop-down menu at the bottom of the window, choose Adobe PDF (Print) and click Save.
In the Export to Adobe PDF window that opens, choose [Press Quality] from the Preset menu at the top of the window.
Click on Marks and Bleeds in the left-hand menu. Check the box reading All Printer’s Marks and check Use Document Bleed Settings.
Click Export to create a print-ready PDF that you can send straight off to the printers. Fantastic work!
All that’s left for you to do is to print your flyer and distribute it. Awesome work!
In this tutorial we’ve covered a range of handy skills for putting together print-ready flyers in Adobe InDesign. Let’s recap some of the skills and techniques you’ve picked up. You can now:
How to Create a Great Business Card in 10 Steps in Adobe InDesign
Grace Fussell
Graphic Designer & Design Writer
Grace is a graphic designer and design writer. She has provided design and branding services for clients across a broad range of industries, including publishing and exhibitions. A self-confessed ‘print geek’, Grace loves to share her experiences of print and graphic design with others through articles, tutorials and courses, on Envato Tuts+ and her teaching business, InDesignSkills.com. Visit Grace’s portfolio site at www.gracefussellstudio.com.
from: https://design.tutsplus.com/tutorials/how-to-design-a-stylish-real-estate-flyer-in-adobe-indesign–cms-28423