 What You’ll Be Creating
Download Free Assets Here
What You’ll Be Creating
Download Free Assets Here
Fall is such a romantic and atmospheric time of year to get married. These autumnal invitations pay tribute to the earthy colors and falling leaves that lend the season its cosy mood.
The invites are quick and simple to create, and we’ll set up the cards in InDesign. Perfect for beginners to the software, this is a great all-round introduction to print design. You can also add optional metallic foiling to the cards, to give an extra touch of luxury to the design.
If you’re short on time and looking for a quick fix, you can find tons of stylish invitation templates to suit every wedding theme and style over on Envato Elements and GraphicRiver.
We’ll be using Adobe InDesign to set up the main layout, and dipping into Illustrator for editing the leaf graphics, so make sure you have access to both of these programs. You’ll also need to download a few fonts and graphics to give you a foundation for creating your invitation:
Save the images to a folder you can easily find, and install the fonts onto your computer.
One thing that many people forget about when they are trying to design their own wedding invitations is the envelope! Envelopes come in a variety of standard sizes, whereas invites can vary widely in size, so it’s always a good idea to pin down your envelope size first, before you size your invitation.
We’ll be setting up the invitation card at a standard size of 109 mm by 154 mm. To accommodate this, you’ll need to buy envelopes which are 4.75 in by 6.5 in when folded and closed. These are sometimes known as ‘6 Baronial’ envelopes.
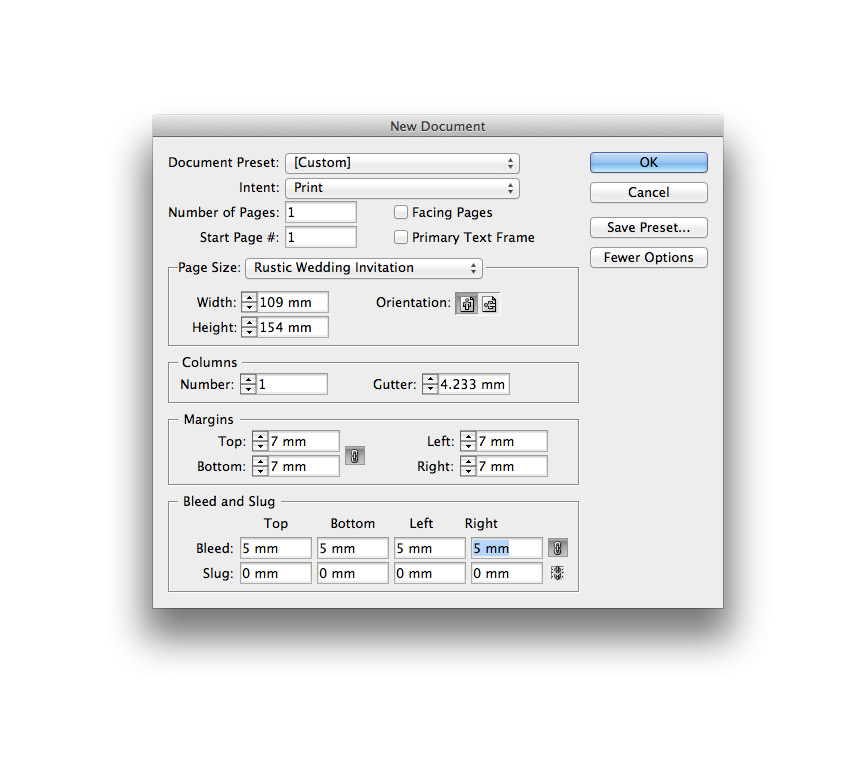
Open up InDesign and go to File > New > Document.
Keep the Intent set to Print and Number of Pages to 1. Uncheck the Facing Pages box.
Set the Width of the page to 109 mm and Height to 154 mm. Add Margins of 7 mm and a Bleed of 5 mm. Then head up and click OK.
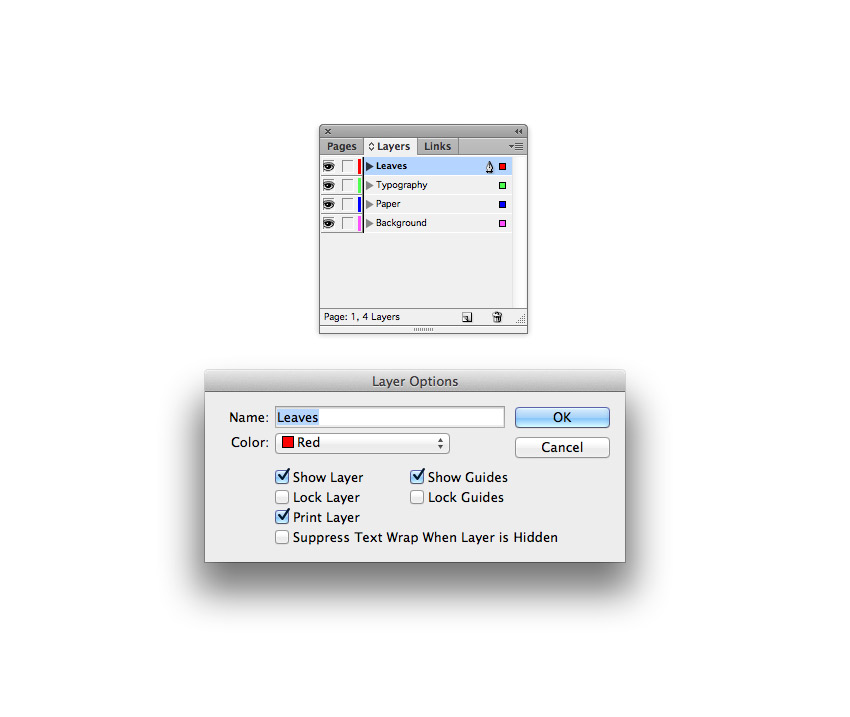
Expand the Layers panel (Window > Layers) and double-click on Layer 1 to open the Layer Options window. Rename the layer Background and click OK.
Choose New Layer from the panel’s drop-down menu (at top-right). Name this second layer Paper, and click OK.
Create a further two new layers, firstly Typography and finally Leaves at the top of the sequence.
Lock all the layers except Background, and click on this layer to activate it.
