# by [Raul Gutierrez Rosado ](https://tutsplus.com/authors/raul-rosado)
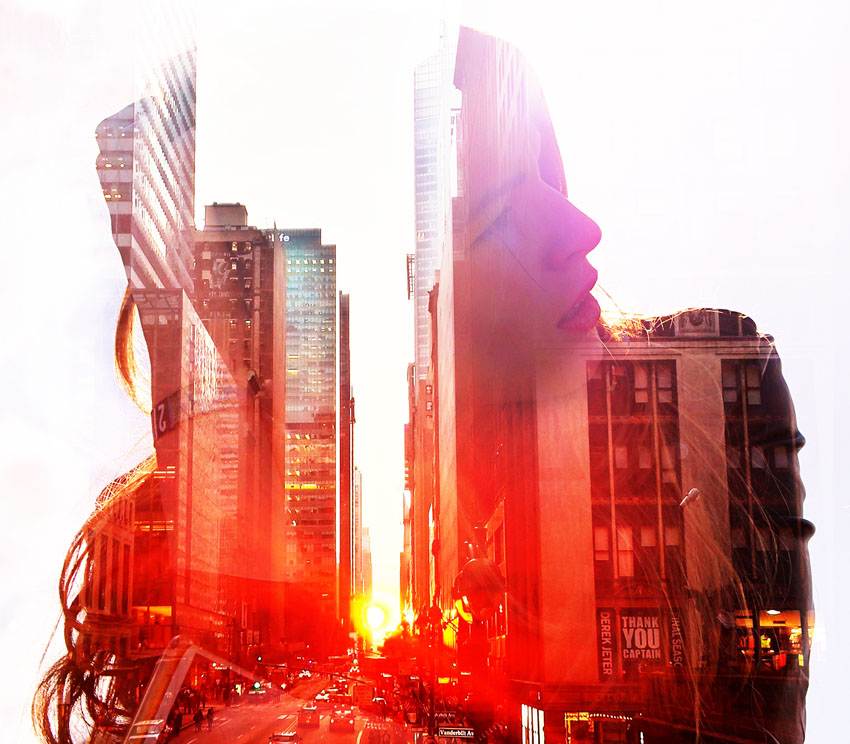What You’ll Be CreatingDouble exposure is a classic photographic technique whose popularity has skyrocketed. Thanks to current software, you don’t need to be a photographer to achieve spectacular and creative double exposure effects.There are many methods to make this effect using Adobe Photoshop. I will show you a simple way which can be recorded by creating an action for multiple uses without repeating the same process every time.## 1. Gather Your Resources
### Step 1
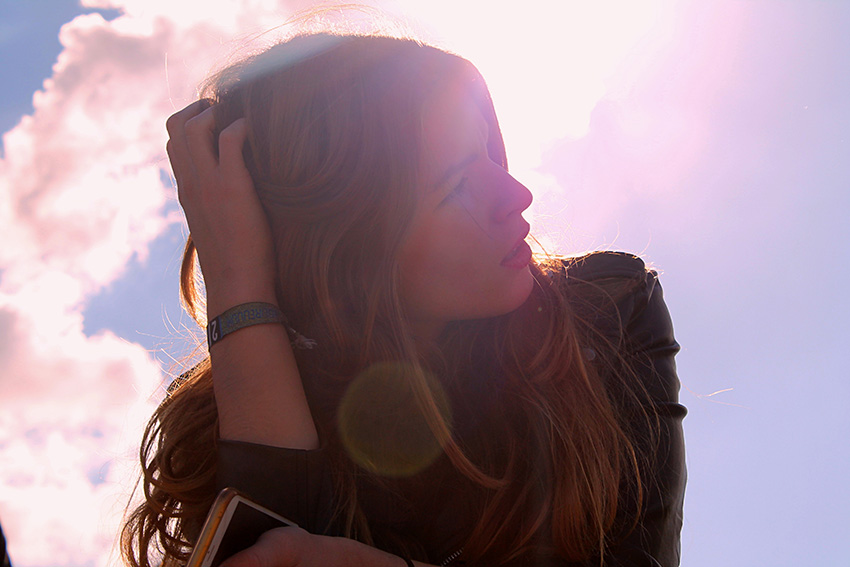
To make this action we need two pictures, one base image and another one that will be overlaid. For the main image, use an image from your favorite royalty free source.
You can use any photo, but for an optimal result, it is preferable that the image has a light and neutral background. Therefore, backlit images work very well for double exposure.
### Step 2
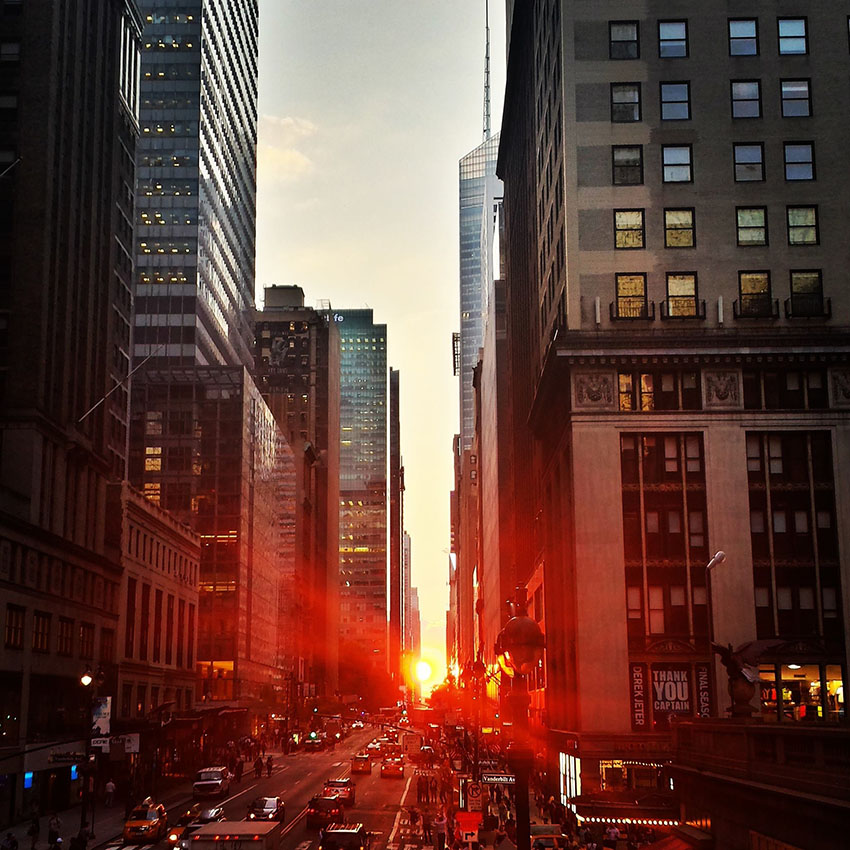
For the fill image, we can use any kind of picture, such as natural landscapes, skylines, abstract shapes, patterns, etc. The photo below is a low rez example.
### Step 3
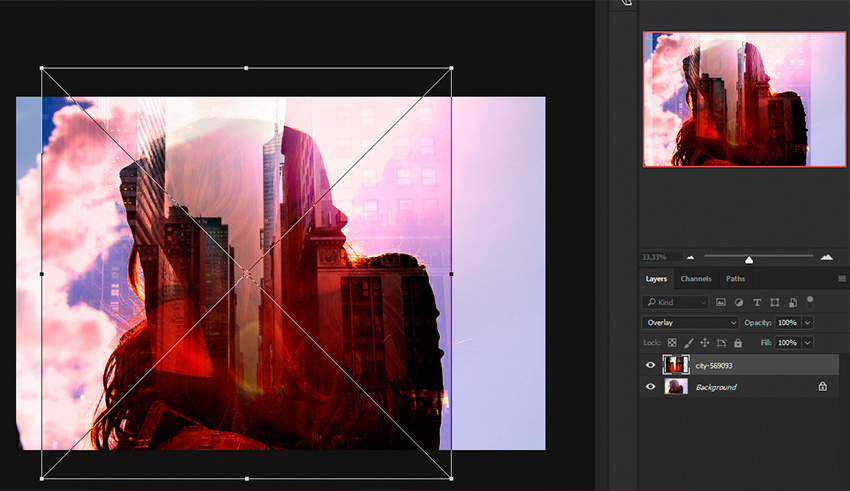
Place the city/ image of choice above the main image; for our action, the names of the layers don’t matter. To place the New York image in the right place, we can change the **Blending Mode** to **Overlay**.
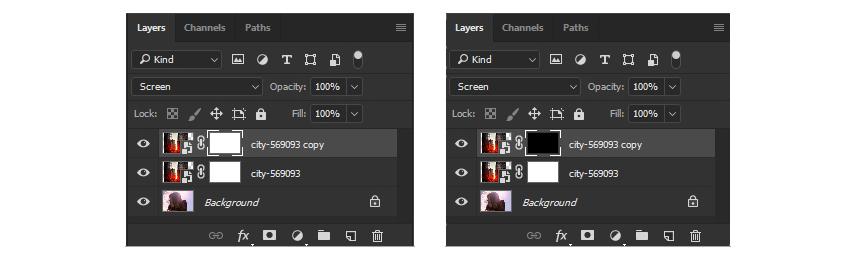
### Step 1
First of all, we change the **Blend Mode** to **Screen** and add a mask to the layer by pressing the **Add layer mask** button at the bottom of the **Layers** panel. Later, we will use this mask for final touches.
### Step 2
Secondly, create a copy of the current layer using **Layer > Duplicate Layer (Control-J)**. For this new layer we change the **Blend Mode** to **Normal**; select its mask and reverse **(Control-I)**.
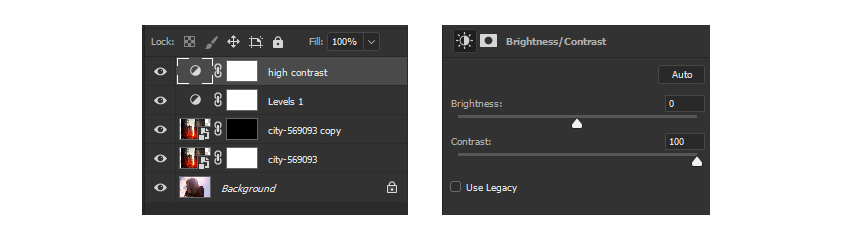
### Step 3
Now we are going to add more brightness and contrast to our image. Therefore, go to **Image > Adjustments > Levels (Control-L)** and type the following values: **8** for shadows, **1.15** for midtones, and **197** for highlights. Click the **OK** button to apply.
### Step 4
To add a **Brightness/Contrast** adjustment layer, go to **Image > Adjustments > Brightness/Contrast** and raise the contrast to **100**.
## 3. Add the Final Touches
After applying our new action to one of our images, we may want to reveal parts of our background image, which were covered by the fill image. To facilitate this, previously we left aside the aforementioned prepared masks.
### Step 1
Firstly, select the mask of our fill image layer and the **Brush Tool (B)** (black color), and then select the proper size for your image. Finally, paint on the mask to erase any areas from the fill image.
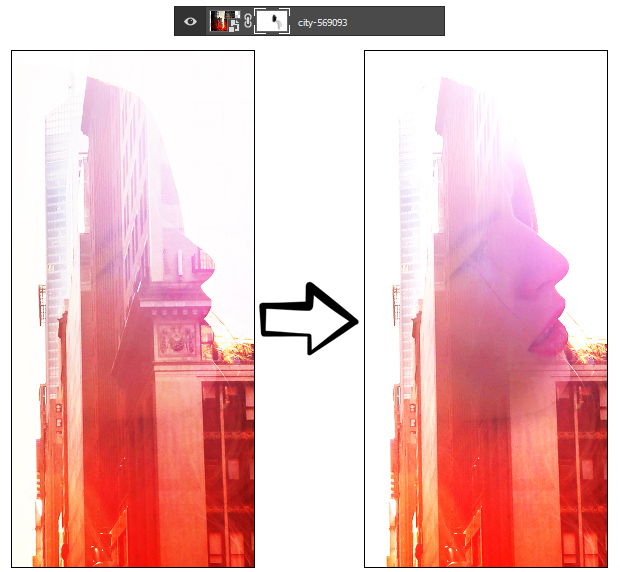
### Step 2
If what we need is to reveal more areas from the fill image, select the mask that we inverted and paint with the **Brush Tool (B)** in white.
## You’re Done!
Now that you have your own double exposure action, you can easily create stunning images in seconds.
I hope that you’ve learned something useful for your future projects.