February 10, 2015
Drawing accurately begins with seeing accurately. As an artist learning to draw, you must train your eyes to see accurate proportions within your given subject matter. This is usually easiest to learn with a still life due to its simplicity and stationary nature.
The next time you try to draw something (preferably a still life) take one simple object and assign it as your reference object. This reference object will be the object you visually measure all other objects against. Choose a reference object that is geometric in form and is not exceedingly larger or smaller than the average size of the other objects you’ll be attempting to draw.
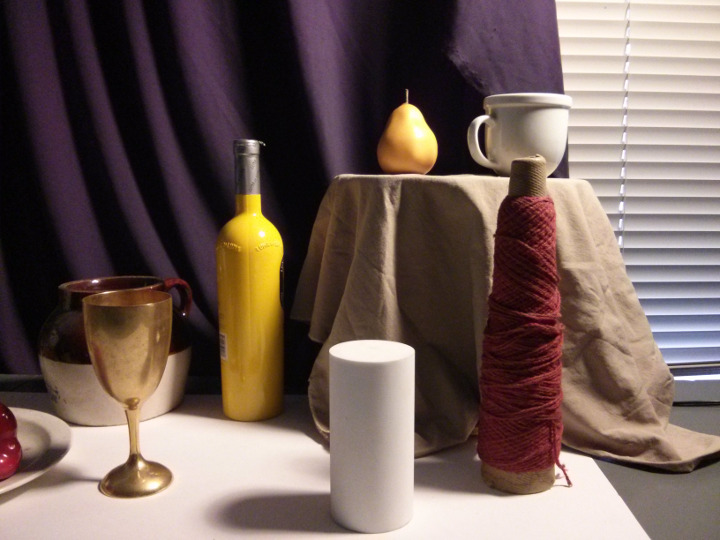
Next, you must ask yourself many questions about the sizes and locations of the other objects as compared to this reference object. It’s important to quantify your findings; in other words, please assign a number to any of your comparisons. This is where art makes a strong connection to math, fractions and percentages to be specific. Look at the photograph of the still life below and pretend you are just about to draw this still life.
 Now that you have seen the still life set up let us take a peek into an artist’s mind to gain some insight into how they would start making important observations regarding this setup’s proportions. Take a look at this next photo accompanied by an artist’s comparative findings listed underneath the photo.
| 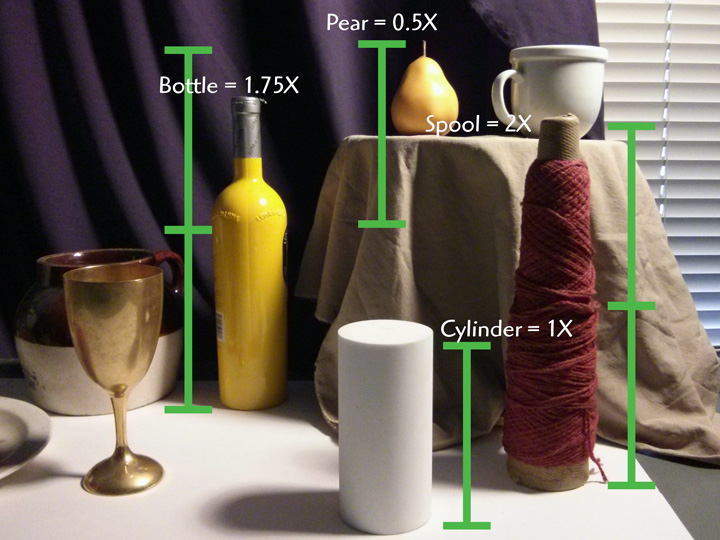Here are some import findings regarding how tall each object is: |
We just examined the heights of still life objects as compared to our reference object – the white cylinder. Next we’ll use the same technique of visually proportioning out the widths of our objects.
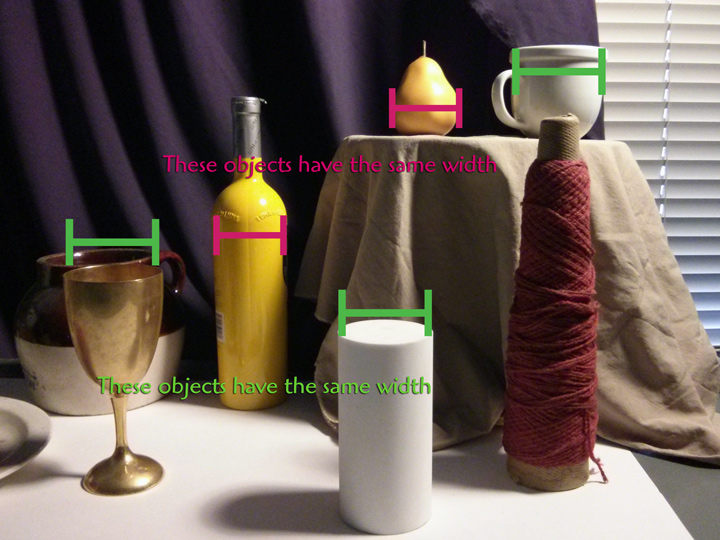
We just discovered how to proportion a drawing in terms of how tall each object is (heights). Now consider how wide each object is. Using the same cylinder for our reference object we can figure out how wide each object is. Do you see any objects that appear to be the same width? Look at the photograph of the still life again and you’ll notice some if the important findings listed below.
|  Here are some import findings regarding how tall each object is: |
You probably noticed that our comparison between the yellow bottle and the pair ignored our reference object (white cylinder). This was a rather obvious comparison and should not have been overlooked. The lesson here is this. While it’s important to begin with a reference object, you have to also look for other means of comparing your drawing’s proportions as well. Keep an open mind for comparing many things at once.
Defining the heights and widths of objects is very important but drawing proportions correctly will also require you to pay attention to the spaces between objects as well! Don’t forget to visually measure out the spaces between objects. You can do this by using the same measuring logic we used previously when we determined the proportional heights and widths of each object.
Scroll up and take a look at the original still life at the start of this post one last time; let’s make a few discoveries regarding correctly proportioning the positions of each object and accounting for the spaces in between. **How big are the spaces in between each object? Is one object positioned higher or lower than another? Be specific when you try to answer these questions and make as many discoveries as possible.
|  |
Here are some import findings regarding the spacing between objects:
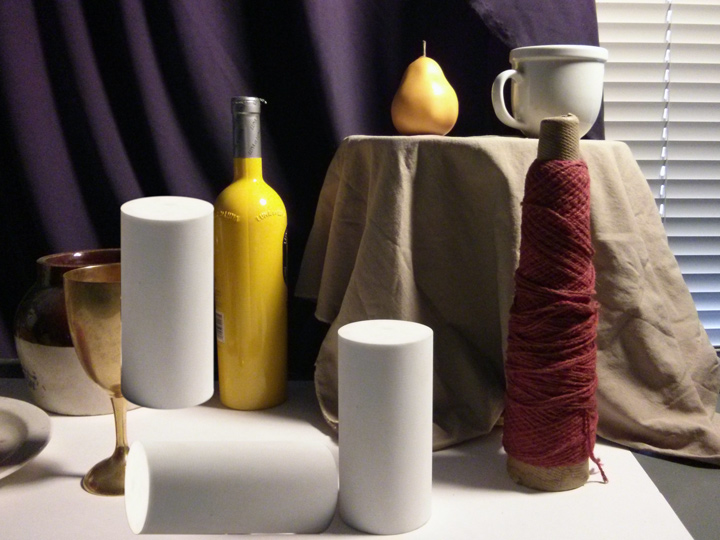
When you start a drawing take some time to really compare the proportions of each object. Drawing proportions correctly is a slow and meticulous process, especially if you are a beginner artist. You should indicate with temporary, light marks how tall objects are, how wide they are, and where they are correctly located in your drawing.Thinking in terms of simple geometric shapes such as rectangles can be helpful. Compare as many objects as you can in your drawing, in fact, it can also be helpful to choose another reference object and use it to double-check all of your original measurements. We used the white cylinder as a means for most of our comparisons so far, but that is really just the beginning. We could, for example, re-measure using the pear as our reference object in order to double-check the accuracy of the proportions in our drawing.
The more analytical you can be in your initial observations the fewer fixes you’ll have to make in your drawing later on. Most of us want to jump right into the actual shading and get down to details, and I also feel the urge to do this. However, your artwork will come out much more accurately and you’ll have far less aggravation fixing mistakes later on if you take the time to draw your proportions correctly from the start.
You should always be visually comparing/measuring objects as they appear to you in real life. This means some objects will be farther away then others. This will cause these objects to look smaller and should be drawn smaller as well. How small? Measure it! Don’t pick up objects and measure them with a ruler. That’s a pointless effort because objects appear to change size depending of where they are located in proximity to the viewer. In other words, the same sized object should be drawn smaller if it is farther away from you.
Measure using your eyes and hold up a pencil at an arms length away from your face, shut one eye and use the pencil as a visual measuring device. You can position the end of the pencil visually on one edge of what you are measuring and slide your thumb down to the mark the other edge of an object. Then, with your finders in the same spot on the pencil you can move the pencil around in your field of vision to compare other objects to the one you just measured.
Things you should be doing when starting a drawing…